Part Master
The Part Master in an ERP (Enterprise Resource Planning) system is an essential component used to manage and organize information related to products managed by a company. The Part Master contains a complete data set related to details about all products purchased or sold by the company. This information includes product code and name, type, model, price, product description, size, color, weight, and other essential information.
The Part Master in an ERP system can help companies in several ways, including:
- Assisting in managing accurate stock and product inventory, allowing the company to optimize stock levels and avoid stock shortages or overstocking. It also simplifies the process of calculating product prices and managing promotions, discounts, and other special offers. In the ERP system, companies can easily set product prices based on predefined rules and strategies.
- Increasing accuracy in processing orders and delivering products. The comprehensive information available in the Part Master enables companies to carry out shipping processes more quickly and accurately.
- Allowing companies to monitor the overall performance of their products, including sales, profits, and profit margins. This can help companies make better business decisions.
- Overall, the Part Master in an ERP system is a crucial element that helps companies manage and monitor all information related to products sold by the company efficiently and effectively.
To complete the Part Master information, click the static data/Inventory Menu/Part. The system will then display a menu as shown in image 3.5.3a.
Part General

In the General tab (image 3.5.3a), register the general information related to your customer data:
- In Code, the system will automatically create the part name code that has been registered.
- In the Discontinue combo box, select "True" if you don't want to activate the relevant part or select "False" if you still want to activate that part.
- In Name, type the name of the part you want to register in the system.
- In Selling Name, type the selling name of that part.
- In Buying Name, type the buying name of that part.
- In the Type combo box, type the type of the registered part. The system provides several options, including:
- Asset, if the part is only a company's fixed asset, not for trading and not a part for production purposes.
- Labor, if the part is labor.
- Office Equipment, if the part is purchased for use as daily office equipment.
- Service, if the part is a service.
- Trading Part, if the part is purchased (not self-produced) for sale.
- Consignment, for part types that are not owned by the company but want to be tracked in detail.
- In the Classification combo box, select the inventory classification as raw material, work in progress, or as finished goods. The system will display the classification according to the specified function.
- In the Part Group combo box, select the inventory group to classify the part you are registering.
- In Part Number and Serial Number, type the number and series of the part you are registering.
- In Registered No, it is used to set the part registration number.
- In the Serialize combo box, select True if you want a serial number on the part, select False if a serial number is not needed.
- In Safety Stock, it is used to set the inventory limit that must be available before deciding to produce or reorder.
- In Minimum Order and Maximum Stock, it is used to set the minimum limit for parts ordered and the maximum stock allowed.
- In the Note field, it is used to record notes about the part.
- Press the Save button to save the data created.
Part Specification
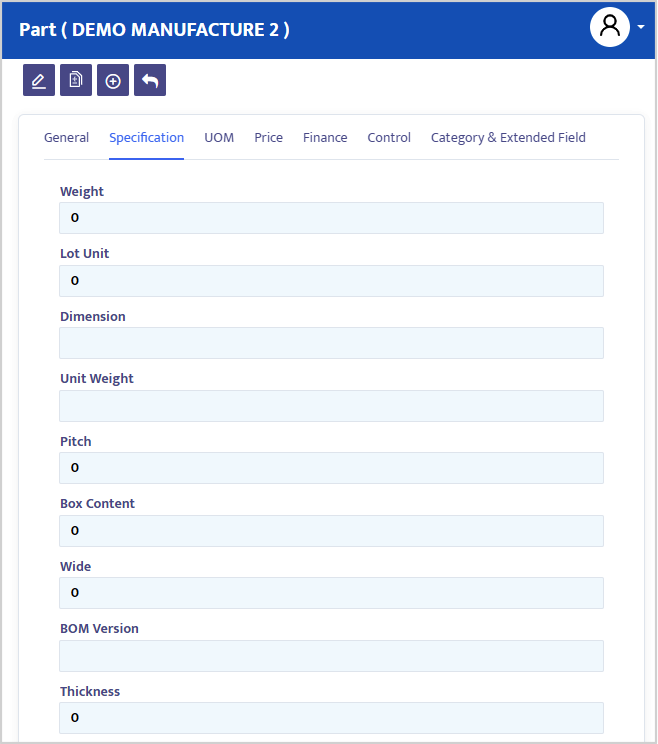
In the Specification tab, it is used to describe the part specifications along with the part's image. Move your pointer to the Specification tab and click, you will move to the following form:
- Drawing No, type the part specification number or the location of the part image in the PC directory.
- Pitch, type the pitch of the part.
- Dimension, type the height x width x thickness x weight of the part.
- Wide, type the width of the part.
- Thickness, type the thickness of the part.
- Weight, type the weight of the part.
- Box Content, type the Box Quantity.
- BOM Version, type the BOM version of the part.
- In the Rating combo box, select the part level.
- Click the browse button and choose a product photo to display if necessary.
- Press the Save button to save the data.
Part Unit of Measurement
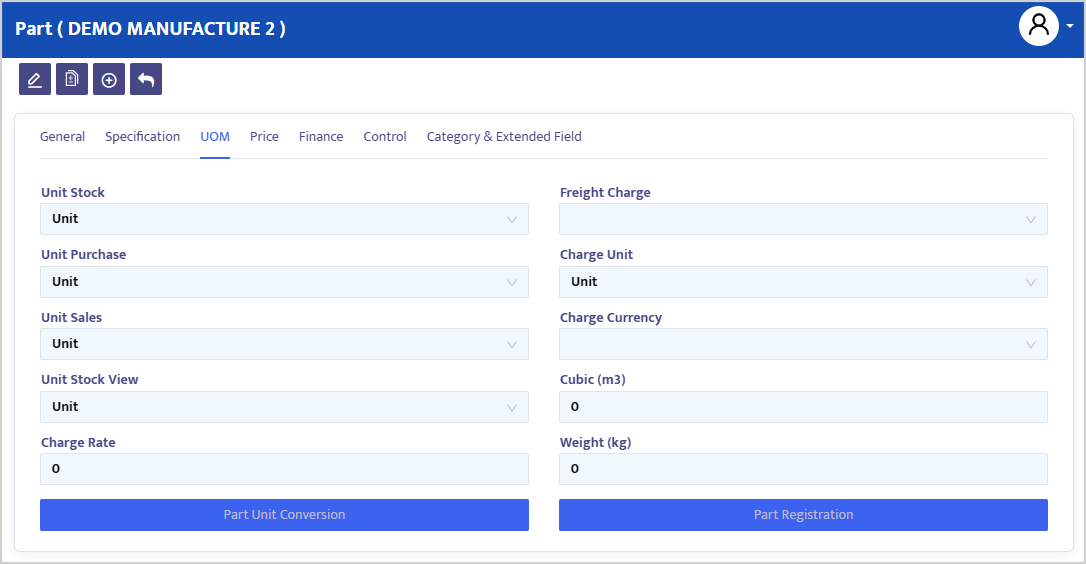
In the Unit of Measurement tab, it is used to set the unit comparison of the part, for example, 1 Box of the part contains or is equivalent to 5 pieces. Point your cursor to the Unit of Measurement tab and click, and you will get a menu as shown in image 3.5.3c:
- In the Unit Stock combo box, select the unit of the part inventory.
- In the Unit Purchase combo box, select the unit of the part purchase.
- In the Unit Sales combo box, select the unit of the part sales.
- In the Freight Charge combo box, select the charge reference, e.g., Container Cubication means applying charges based on cubication.
- In the charge unit combo box, select the unit used.
- In the Cubic (m3) field, type the amount in cubic meters (m3).
- In the Weight (Kg) field, type the amount in kilograms (Kg).
- In the currency combo box, select the currency used.
- In the charge rate field, type the charge rate.
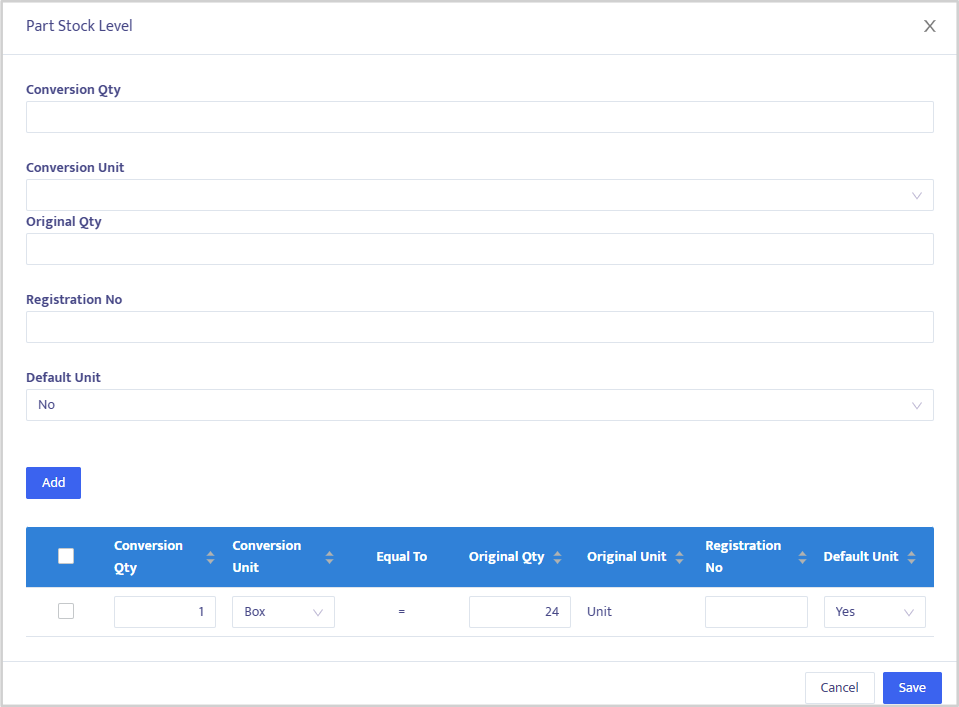
- In the Part Unit Conversion tab, click and the UoM Detail form like the image 3.5.3d will appear:
- In the Conversion Qty column, register the part quantity to be converted.
- In the Conversion Unit column, select the unit of the part.
- In the Original Qty column, select the base quantity.
- In the Original Unit column, the system will automatically create the unit based on the registered unit.
- Then click the ok button.
Part Conversion
Part Price

In the Price tab, it is used to set the price category for the part you register. Point your cursor to the Price tab and click, and you will get a form as shown in image 3.5.3e:
- Price mark up down, used to increase and decrease prices based on a percentage or a specific value.
- Selling price plan contains information for designing selling prices within a certain period.
- Cost price information contains product cost price information.
- Selling Price Information contains product selling price information based on the predetermined price category.
Part Finance
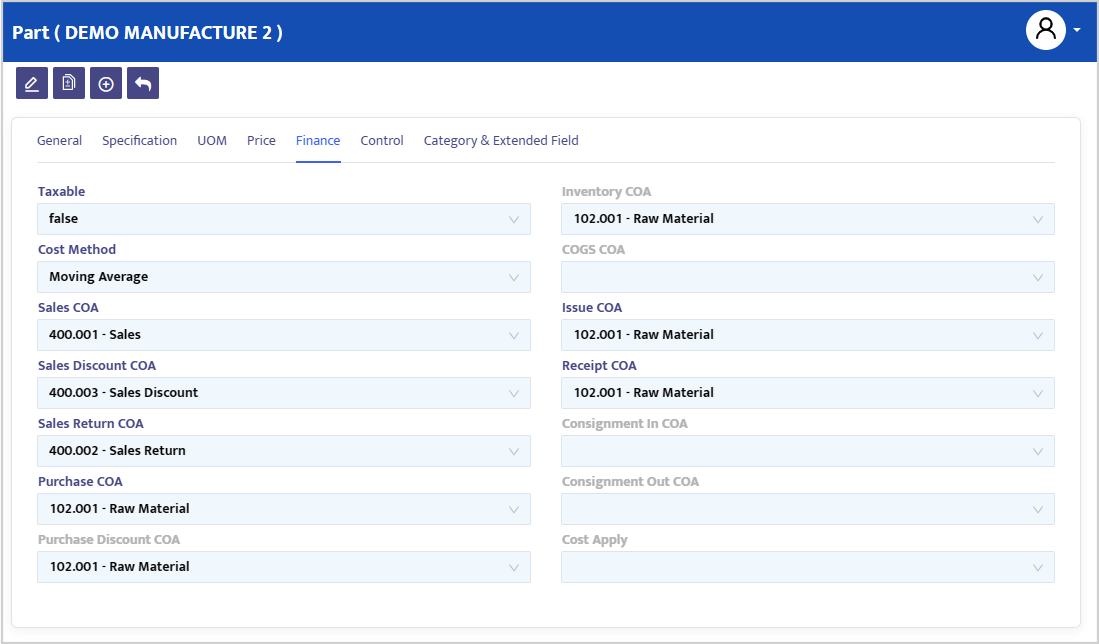
In the Finance tab, register part information related to mapping the part to specific accounts (CoA). The system will create automatic journals from each part movement transaction. Point your cursor to the Finance tab and click, and you will move to a form like the one in image 3.5.3f:
- In the Taxable combo box, select “True” if the part will be subject to tax, and select “False” if not.
- In the Cost Method combo box, choose the calculation method for the part inventory cost. The system has provided three cost calculation methods; Moving Average Method, First In First Out (FIFO) Method, and Last In First Out (LIFO) Method.
- In the Sales COA combo box, select the sales account for the part.
- In the Sales Discount COA combo box, select the sales return account for the part.
- In the Sales Return COA combo box, select the sales discount account for the part.
- In the Purchase COA combo box, select the purchase account for the part.
- In the Purchase Discount COA combo box, select the purchase discount account for the part.
- In the Inventory COA combo box, select the inventory account for the part. This combo box will be active if the registered part is a production part category.
- In the COGS COA combo box, select the cost of goods sold account for the part.
- In the Issue CoA combo box, select the account for the part to be issued.
- In the Receipt CoA combo box, select the account for the part to be receipted.
- In the Cost Apply combo box, select the standard cost account for the type of service that will be charged to the product cost.
- Press the Save button to save the data you have created.
Part Part Category
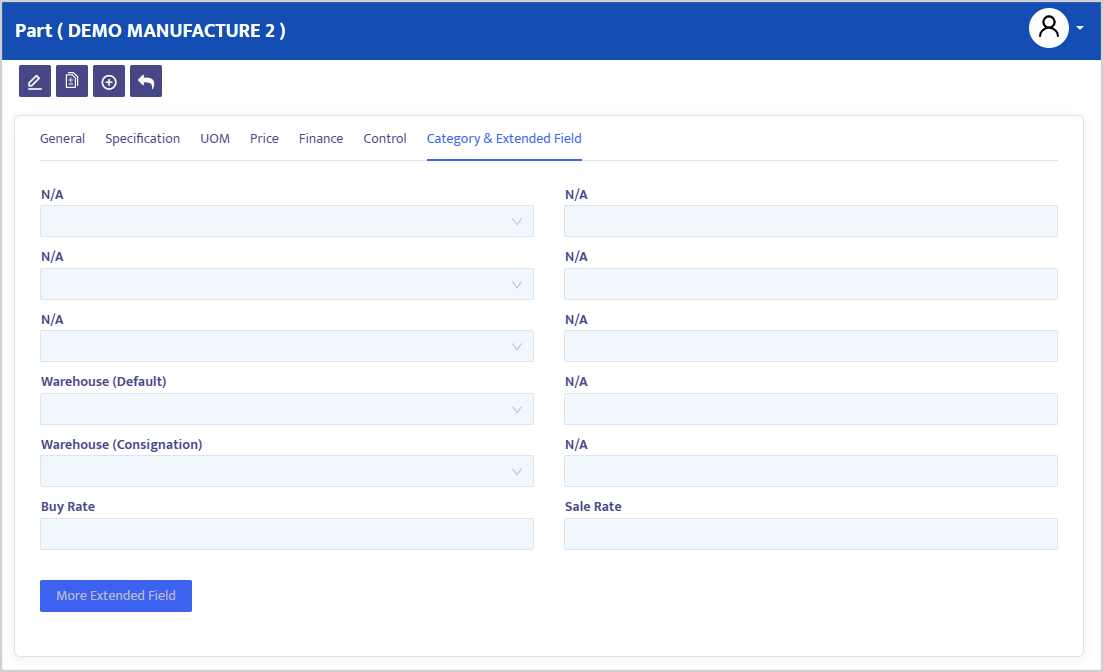
In the Category & Extended Field tab, the system will display the part Category according to our preferences. You can see the activation of the part category in the initial system setup discussion. Point your cursor to the Category tab and click, and you will move to a form like the one in image 3.5.3g.