Good Receive Note
When a supplier sends goods, they certainly include a Delivery Order (DO). This delivery order will display information such as the delivery order date, item name, quantity of goods, and the PO (Purchase Order) number for the goods being sent. The storeman's task is to ensure that the quantity and type of goods match the order and physically check the goods to ensure there are no damages.
As a document proof of receipt, the storeman will prepare a Goods Receive Note transaction and print a goods receipt proof form. This means that the goods sent by the supplier have been received, inspected, and match the order. Detailed SOPs for goods receipt have been prepared. The application will make all procedures interconnected and will protect and prepare reports automatically for each stage.
Setup
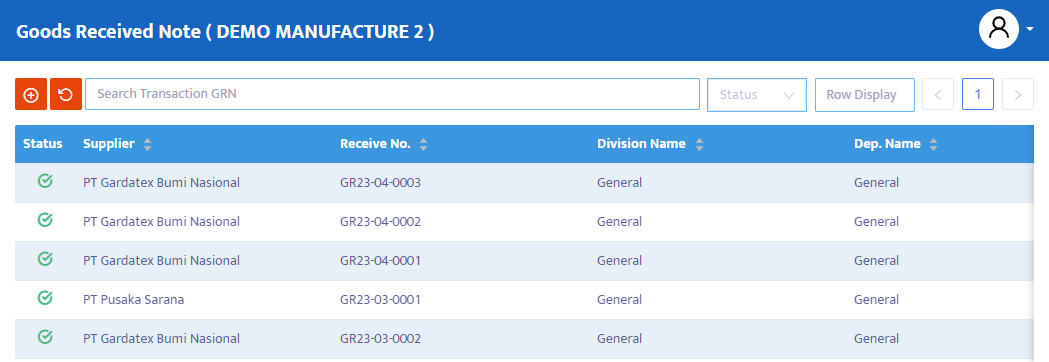
To record a Goods Receive Note transaction, select the Procurement menu, then click on the Goods Receipt Note menu. The system will display the GRN transaction menu as shown in Figure 5.1.3.
The following are the steps to complete a Goods Receive Note (GRN) transaction:
- Click the Add Item [+] button on the GRN transaction list that you have opened. Refer to Figure 5.1.3a.
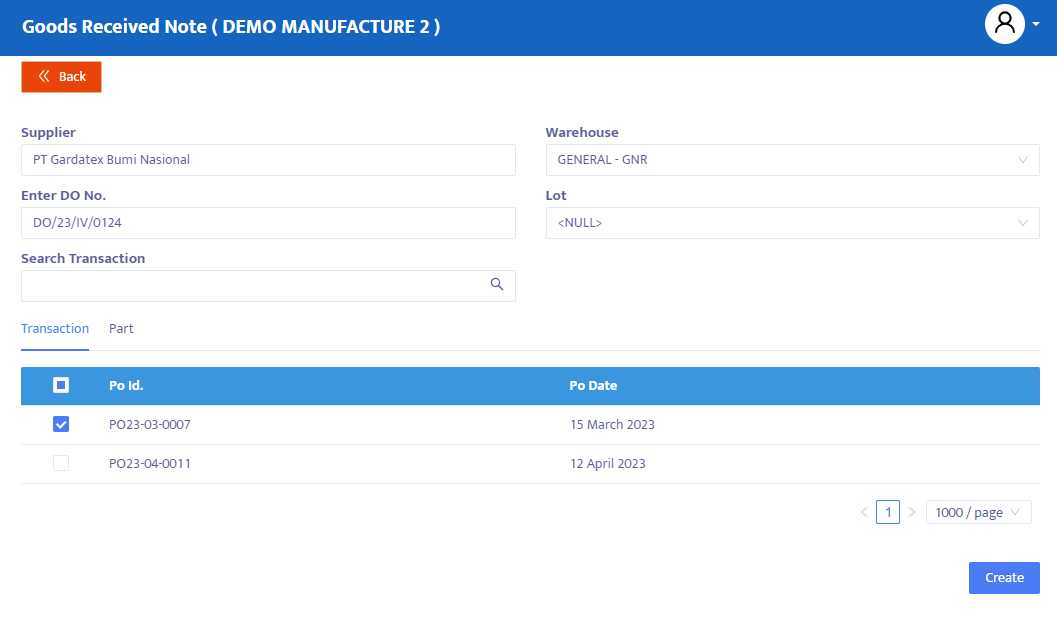
- Next, the system will display the add item form as shown in Figure 5.1.3b. Perform Supplier filtering. After that, type the Supplier DO No and select the Warehouse and Lot Number if necessary. Tick the desired transaction and then click the Create button to create a GRN transaction.
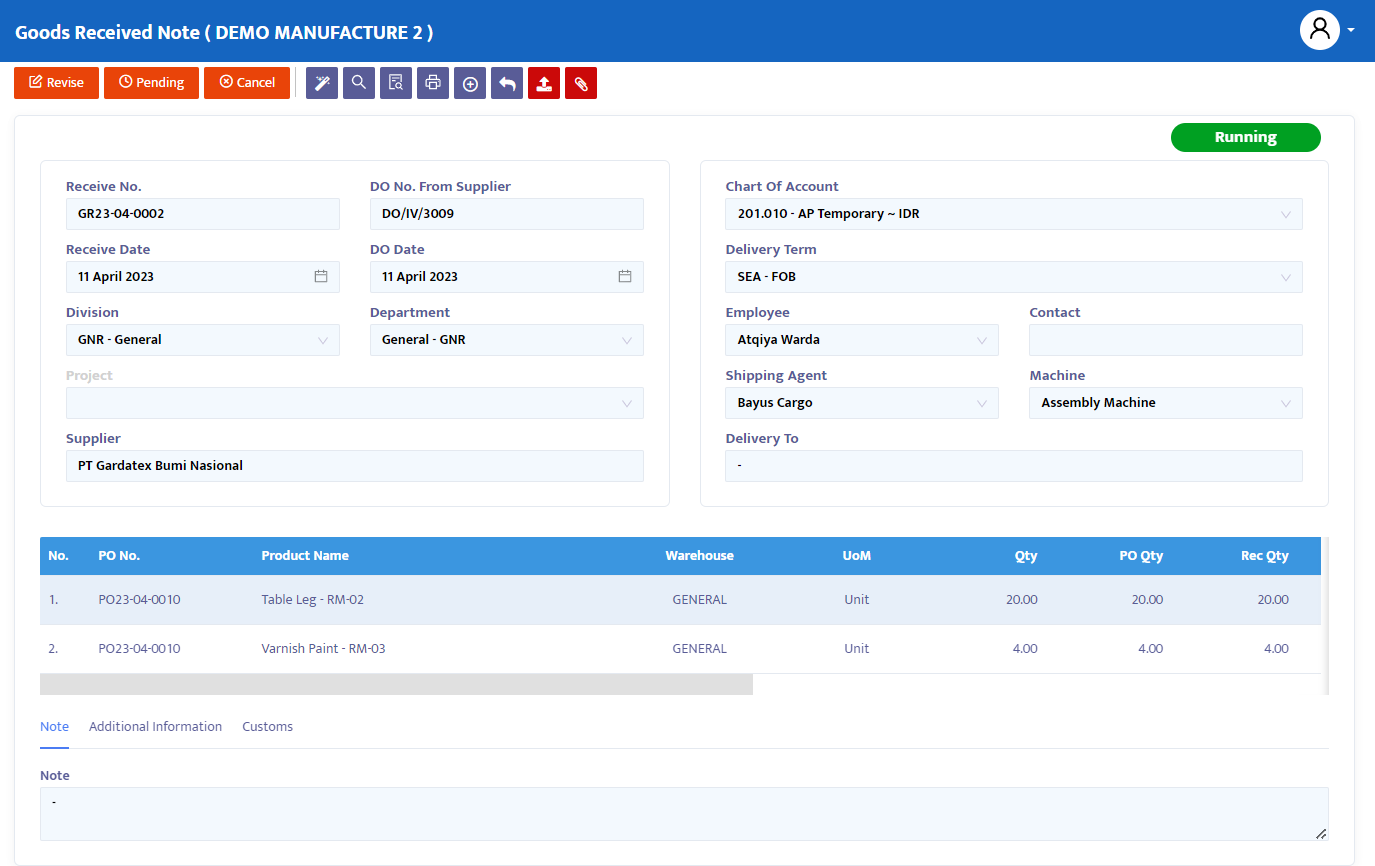
After the Add Item process from the PO transaction, the system will display the GRN transaction form that already contains information from the PO selected previously.
Double-check to ensure data accuracy. Here is a detailed explanation of the information in the GRN transaction:
- In the Receive No field, the system will automatically provide numbering, but you can still edit it according to your company's needs or standards.
- In the DO No From Supplier field, it contains the supplier's DO number that you previously filled in during the add item process. Modify if necessary.
- In the Receive Date field, the system will provide a date that matches the date on your computer when this form is opened. However, you can edit the GRN form date according to your needs.
- In the DO Date field, type the DO document date information from the Supplier.
- In the Division combo box, the system will display the division related to this order if your company allocates per division.
- In the Department combo box, the system will display the name of the department related to this order if your company allocates per department.
- In the Project combo box, the system will display the name of the project related to the respective request transaction.
- In the Supplier combo box, the system will display the name of the supplier that you previously selected.
- In the Chart of Account field, the system will display the default CoA AP Temporary as the temporary debt account for the goods receipt transaction. This account will be used to make GRN transaction journals.
- In the Delivery Term combo, select the delivery transaction term.
- In the Employee combo box, select the name of the goods receiving officer related to the issuance of this document.
- In the Contact field, type the name of another officer if needed.
- In the Shipping Agent combo box, select the shipping agent for the respective transaction.
- In the Machine combo box, include the name of the machine if the order is related to a particular machine. Ignore if not related.
After completing these data, the system will automatically display the product that you have taken from the previous PO transaction.
- PO No, contains the reference PO number of the respective product. 1 GRN can receive several PO numbers at once if necessary.
- Product, contains the name information of the selected product.
- Warehouse, contains the warehouse location where the product will be stored.
- Quantity, contains the quantity of product received. Make changes if necessary.
- PO Qty, informs you of the full PO Qty of the respective product.
- Rec Qty, displays the total quantity of goods received.
- CoA, contains account information that will be debited from the respective product.
- Note, create more detailed and specific notes in the Note facility for each product you order.
After completion, click the Save button at the top of the transaction to save the data.
On the navigation button above the transaction, change the necessary transaction status. The choices provided by the system are:
- Entry, still in the process of registering GRN form transaction data into the system. At this status, data can still be edited and deleted.
- Confirm, transaction data is confirmed to the system but not posted yet. At this status, data cannot be edited unless the Confirm status is first changed to the Revise status.
- Running, transaction data is posted into the system. This status is run after the Confirm status. If you do not use the Running status, you will not be able to proceed to the next form (in this case, the SI form). Similarly, with the Confirm status, to edit data under the Running status, it must first be changed to the Revise status.
- Revise, this status is only used for editing data but cannot delete/ eliminate (all) transaction data on this form.
- Pending, this transaction form is temporarily closed for the purpose of postponement. This status can still be opened to be resumed. If from this GRN form you have continued to open the Supplier Invoice form and you give the Pending status to the GRN form, then the Supplier Invoice transaction form and also Payment will experience postponement (postpone).
- Cancel, the transaction form is canceled and cannot be reopened.
- Close, all transaction forms are closed and cannot be reopened.
Change the Entry status to Confirm, then to Running to post this transaction and use the wizard feature if you want to proceed to the next form, but you can also use the manual way (add item) for the next transaction, in this case, the Supplier Invoice.
To display the transaction document, click the Preview button.