Material Request
In the ERP application, Material Request is the process of requesting materials or goods used in production or business operations. This process starts from the request of materials or goods by the department that needs them, up to the approval from management, purchase, and delivery of these materials or goods.
Material Request in the SOFICloud ERP application helps companies manage and monitor inventory of materials and goods effectively. This can help companies optimize inventory and reduce unnecessary inventory costs. In addition, Material Request in the SOFICloud ERP application can also help companies improve efficiency and overall business performance.
Setup
To record a Stock Issue transaction, select the Inventory menu, then click the Material Request menu. The system will then display this transaction menu as shown in Figure 6.5.
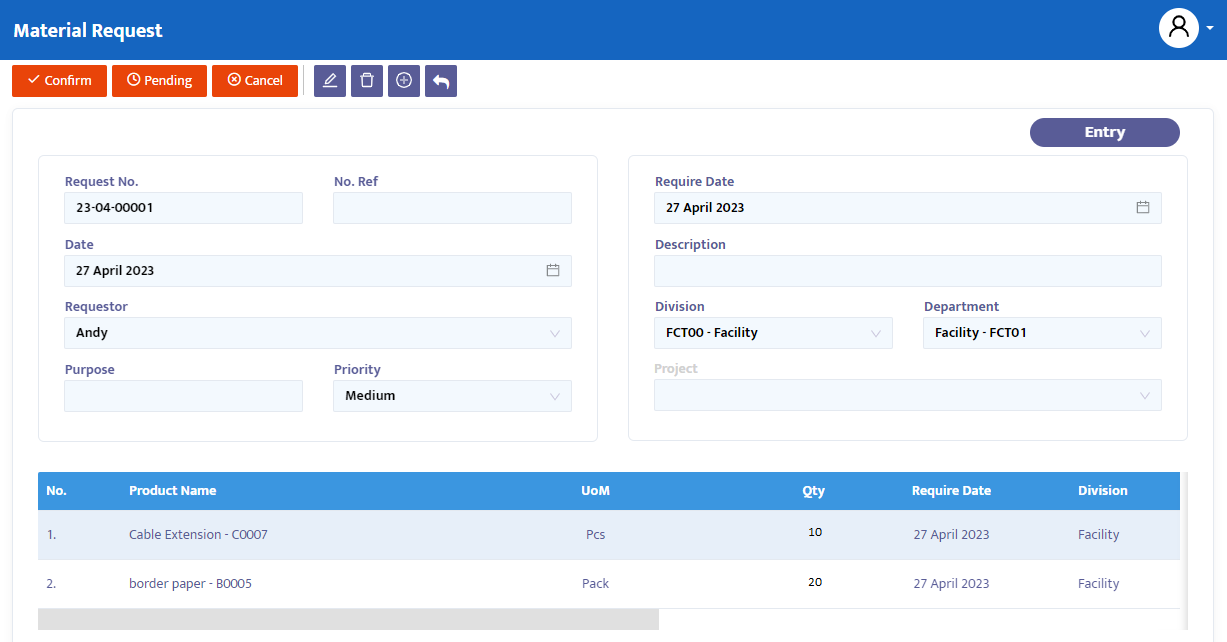
In the Request No field, the system will automatically provide numbering, but you can still edit it according to company needs or standards.
In the Ref No field, add other reference number information if needed.
In the Date field, the system will provide the same date as your computer when this form is opened. But you can edit the date of this Material Request form according to your needs.
In the Requestor field, select the name of the requestor who is requesting the goods.
In the Require Date field, type the date when the ordered product is needed. The system will provide the same date as your computer when this form is opened. Make date changes if necessary.
In the Description field, type other information.
In the Purpose field, type the purpose of the related material request.
In the Priority combo box, select the necessary priority level. The system provides options for Low, Medium, or High Priority.
In the Division combo box, select the division responsible for this order if your company allocates by division.
In the Department combo box, select the department name responsible for this order if your company allocates by department.
In the Project combo box, select the project related to the request transaction.
After completing these data, the system will automatically display the project selection column. Fill in the product according to your needs:
- Product, search the product name or code from the list of products you have previously registered.
- Quantity, fill in the quantity of the product you want to order.
- Request Date, type the specific date of need for the related goods. This request date field serves to provide more specific product requirement information.
- Click Add Product when finished. The system will then enter the product you have selected into the transaction details.
- Make another selection for other products you need, then click the Add Product button to add it to the list of transaction details.
Once finished, click the Save button at the top of the transaction to save the data.
On the navigation button above the transaction, make the necessary transaction status changes. The choices provided by the system are:
- Entry, still in the process of registering PR form transaction data into the system. At this status, the data can still be edited and deleted.
- Confirm, transaction data is confirmed to the system but not yet posted. At this status, the data cannot be edited unless the Confirm status is first changed to the Revise status.
- Running, the transaction data is posted into the system. This status is executed after the Confirm status. If you do not use the Running status, you will not be able to proceed to the next form (in this case the PO form). Similarly, with the Confirm status, to edit the data of the Running status, it must first be changed to the Revise status.
- Revise, this status is used only to edit data but cannot delete/eliminate (all) transaction data on this form.
- Pending, this transaction form is temporarily closed for the purpose of delay. This status can still be reopened to continue. If from this PR form you have proceeded to open the PO, GRN, and Supplier Invoice forms and you give the Pending status to this PR form, then the PO, GRN/Receive Invoice/Receipt transaction forms will also be delayed (postponed).
- Cancel, the transaction form is canceled and cannot be reopened.
- Close, all transaction forms are closed and cannot be reopened.
Change the Entry status to Confirm, then to Running to post this transaction and use the wizard facility if you want to proceed to the next form, but you can also use the manual way (add item) on the next transaction, in this case, Purchase Order.
To display the transaction document, click the Preview button.