Stock Transfer
The inter-warehouse stock transfer is the process of sending goods from one location or warehouse to another within the company. In an ERP application, inter-warehouse stock transfer is usually associated with the inventory management module or warehouse management module.
In the SOFICloud ERP application, inter-warehouse stock transfer can be done by entering it into the Transfer transaction. When the stock transfer transaction is made, the system will record all necessary information such as the quantity of goods, transfer destination, transfer date, and so on. In addition, the system will also reduce the quantity of inventory in the original warehouse and increase inventory in the destination warehouse automatically.
In the SOFICloud ERP application, inter-warehouse stock transfer allows the company to manage inventory more effectively and efficiently. By using this feature, the company can ensure that inventory is always available at the right location and at the right time.
However, to optimize the inter-warehouse stock transfer process in the SOFICloud ERP application, the company needs to ensure that the system is well integrated and allows centralized inventory management. This is to ensure that each stock transfer transaction can be tracked and managed properly, so the company can make better decisions related to inventory management.
Setup
To record the Stock Transfer transaction, select the Inventory menu then click the Stock Transfer menu. The system will display the transaction menu as in figure 6.3
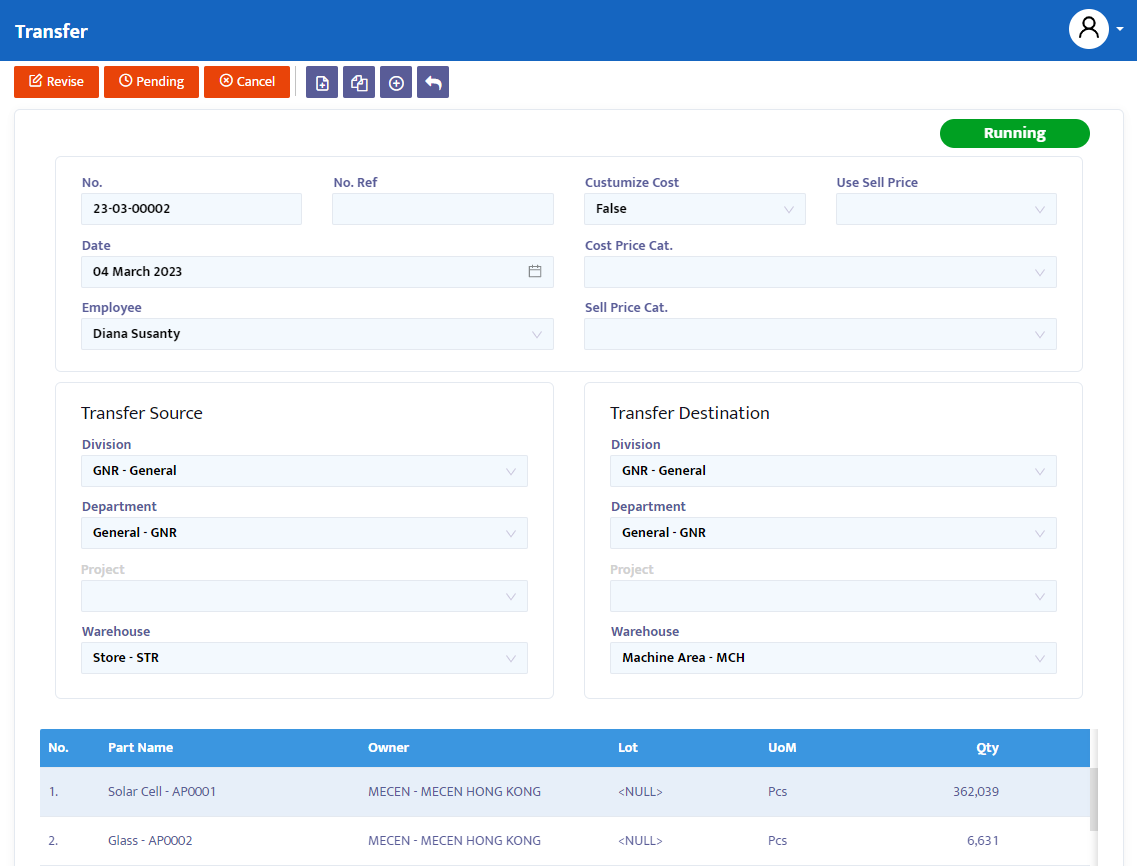
In the No field, the system will automatically provide the numbering of the transfer form that has been created.
In the Date field, the system will provide the same date as the date on your computer when this form is opened. But you can edit the date.
In the Employee combo box, select your employee's name who is responsible for this transfer form.
In the Customize Cost combo box, select False if this transfer transaction is not charged a part price or select True if a part price is charged at the time of transfer.
In the Use Sell Price Combo Box, select True if you want to use the selling price in the transfer transaction or select False if not.
In the Transfer Source column, determine the origin of the inventory to be transferred.
In the Transfer Destination column, determine the destination for the transfer of goods inventory.
In the Division combo box, select the division responsible for this transfer form if your company allocates per division.
In the Department combo box, select the department responsible for this transfer form if your company allocates per department.
In the Project combo box, select the project responsible for this transfer form if your company allocates per project.
In the Warehouse combo box, select the relevant warehouse location
In the Note field, provide notes about the record if needed.
In the Sub total combo box, select the type of currency to be used.
Press the Save button to save this initial data.
Next, the system will display product options to be transferred. Make a data selection and click the Add Item button to enter product choices into the transaction detail column.
In the data table;
- In the Part Name column, the system will display a list of selected parts
- In the UoM column, the system will automatically display the unit part, but you can change this unit by clicking the small box next to the UoM record to activate the unit choice.
- In the Qty column, type the number of unit parts that will be added (normal value) to the stock inventory or parts that will be reduced (minus value) from the stock inventory.
- In the Base Qty column, the system will display the actual quantity value if you are using a unit conversion value. For example, 1 box = 12 pcs, if you input 2 boxes in the qty column, then the base qty will display a quantity of 24 pcs.
- In the Price column, type the part price if needed
- In the Note column, provide the necessary notes on the record.
In the Note Combo Box, type the necessary notes for this Transfer form.
In the Additional Information Combo Box, type in the additional information needed on this Transfer form.
In the Normal combo box in the Transfer1 field title, select the system status of the Transfer form. The options provided by the system are:
- Entry, still in the process of registering data into the system. In this status, the data can still be edited and deleted.
- Confirm, data is confirmed to the system but not yet posted. In this status, data cannot be edited unless the Confirm status is first changed to Revise status.
- Running, data is posted into the system and directly increases or reduces stock. This status is run after the Confirm status. Similarly with the Confirm status, to edit or delete data, the Running status must first be changed to Revise status.
- Revise, this status is used to edit data. Although data in this status can be edited, in the Inventory Movement report, data that has been revised, edited, and deleted will be visible. You are advised not to use the revise status too often to keep the report tidy.
- Pending, the form is closed with the intention of delay. This status can still be opened to be continued.
- Cancel, the transaction form is canceled and cannot be reopened.
- Close, the transaction form is closed and cannot be reopened.
Change the Entry status to Confirm, then Running to post this transaction.