Delivery Order (DO)
The Delivery Order (DO) transaction serves as an instruction letter for the delivery of goods that have been ordered by the customer in accordance with the mutual agreement between the seller and the buyer. The DO transaction is usually preceded by the issuance of a PO by the buyer and recorded as a Sales Order by the seller.
In addition to detailed information about the goods to be delivered, the DO also contains other important information such as the shipping agent, shipping address, vehicle information, and the names of the officers involved in the delivery. Add other important information if necessary.
In the system, the DO transaction will reduce the stock quantity in the warehouse and record a journal of merchandise inventory or purchase on temporary debt.
The Delivery Order has several important functions in an ERP application, including:
- Optimizing delivery and inventory. The Delivery Order helps companies optimize delivery and inventory by providing accurate information about stock and timely delivery schedules. With this information, companies can manage inventory more effectively and ensure that the required goods are always available.
- Improving delivery accuracy. The Delivery Order can help improve delivery accuracy by providing complete information about orders and deliveries, including information about the type of product or service, the quantity to be shipped, and the shipping address. With this information, companies can minimize human errors that may occur during the delivery process.
- Reducing shipping costs. The Delivery Order can help companies reduce shipping costs by optimizing shipping routes and ensuring that the goods shipped match the order and delivery schedule. As a result, companies can reduce shipping costs and increase delivery efficiency.
- Enhancing customer satisfaction. The Delivery Order can help improve customer satisfaction by providing accurate information about shipping and scheduling. With this information, customers can arrange their goods receipt schedule and ensure that the goods they receive match the order and desired specifications.
- Increasing operational efficiency. The Delivery Order can help improve operational efficiency by automating the shipping process and speeding up delivery times. By automating the shipping process, companies can minimize human errors and increase productivity.
Setup
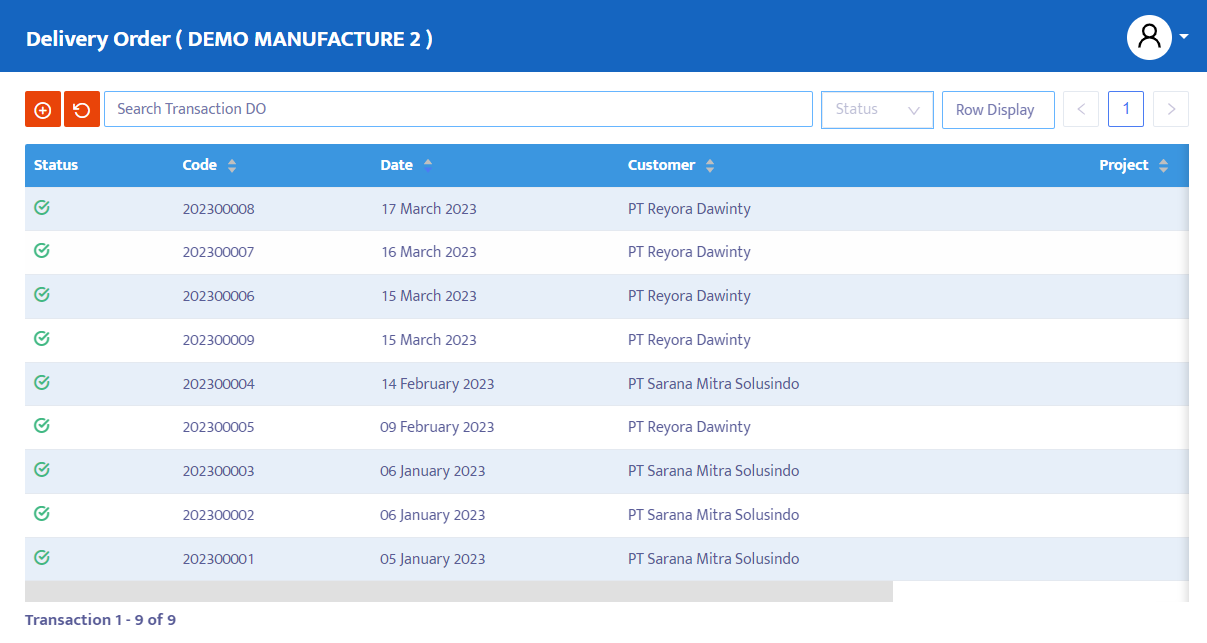
To record a Delivery Order transaction, select the Sales menu and then click the Delivery Order menu. The system will display the DO transaction menu as shown in Figure 5.3.
Here are the steps to complete a Delivery Order (DO) transaction:
Click the Add Item [+] button on the DO transaction list that you have opened. See in Figure 5.3a.
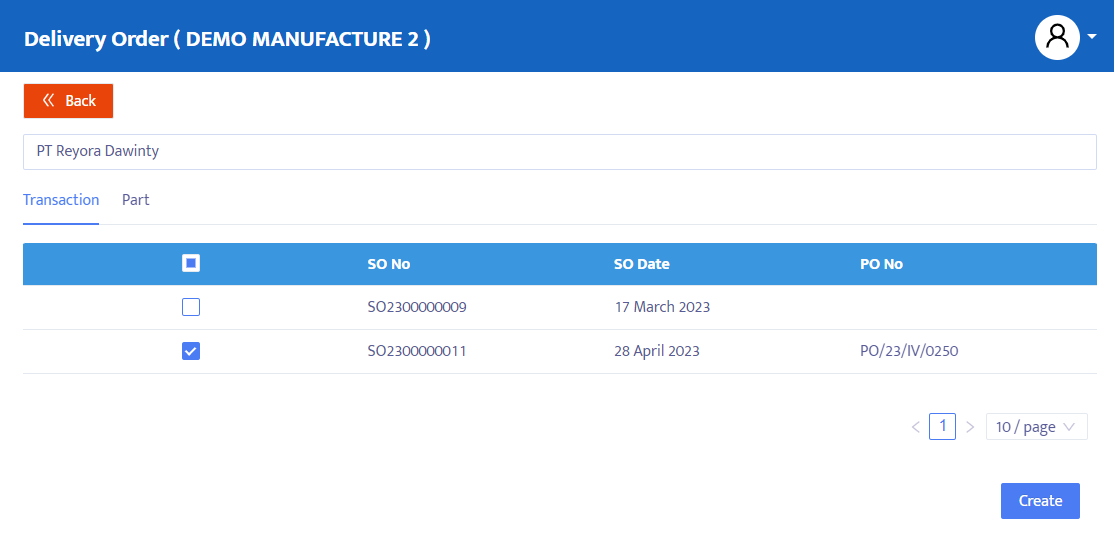
Next, the system will display the add item form as shown in Figure 5.3b. Filter by Customer. Tick the desired transactions then click the Create button to make a DO transaction.
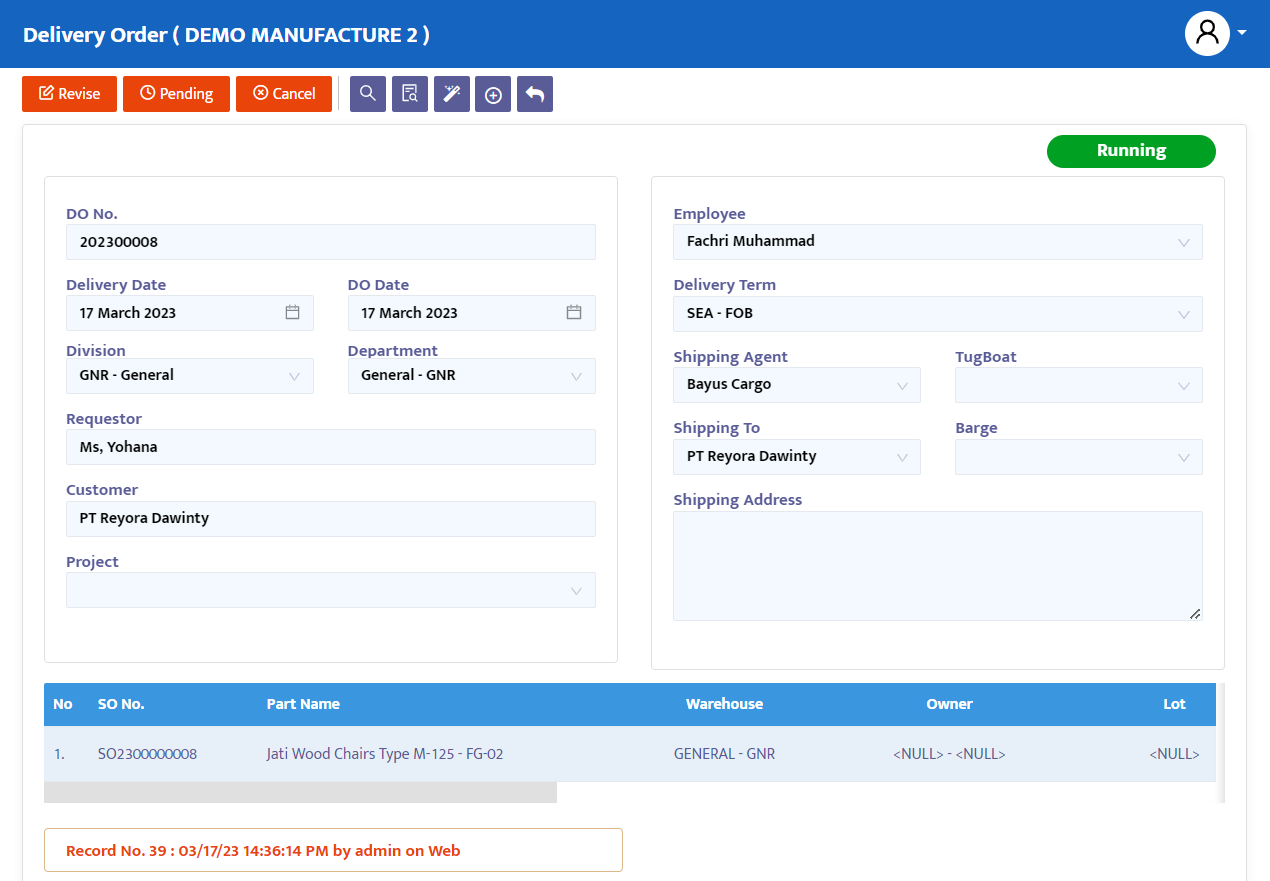
After performing the Add Item process from the SO transaction, the system will display the DO transaction form that already contains information from the previously selected SO.
Double-check to ensure the accuracy of the data. Here is a detailed explanation of the information in the DO transaction:
- In the DO No field, the system will automatically provide numbering, but you can still edit it if necessary.
- In the Delivery Date field, the system will provide a date that is the same as the date on your computer when this form is opened. However, you can edit the date of this DO form according to your needs.
- In the DO Date field, type in the DO document date information.
- In the Division combo box, the system will display the division related to this order if your company allocates by division.
- In the Department combo box, the system will display the department name related to this order if your company allocates by department.
- In the Requestor field, type in the information of the Person In Charge (PIC) related to the customer's order.
- In the Customer combo box, the system will display the supplier name that you previously selected.
- In the Project combo box, the system will display the project name related to the concerned request transaction.
- In the Employee combo box, the system will display the PIC for the goods delivery from the company.
- In the Delivery Term combo, choose the delivery term of the transaction.
- In the Contact field, type in the name of another officer if necessary.
- In the Shipping Agent combo box, choose the shipping agent for the related transaction.
- In the Shipping to combo box, choose the shipping address if it's different from the customer's address.
- In the Shipping Address field, the system will display the address from the shipping address that has been completed in the customer master.
After completing the data, the system will automatically display the product you have taken from the previous SO transaction.
- SO No, contains the SO reference number for the product. 1 DO can deliver several SO numbers at once if needed.
- Part Name/Product, contains information on the product name that has been selected.
- Warehouse, contains the location of the warehouse where the product is taken.
- Quantity, contains the quantity of the product received. Make changes if necessary.
- Lot, select the lot number of the product.
- Qty, displays the total quantity of goods shipped.
- Tax and PPh, contains tax information for the product.
- CoA, contains information on the account to be debited from the product.
- Note, create more detailed and specific notes in the Note facility for each product you order.
When finished, click the Save button at the top of the transaction to save the data.
On the navigation button above the transaction, make the necessary transaction status changes. The choices provided by the system are:
- Entry, still in the process of registering the DO transaction data into the system. At this status, data can still be edited and deleted.
- Confirm, transaction data is confirmed to the system but has not yet been posted. In this status, the data cannot be edited unless the Confirm status is first changed to the Revise status.
- Running, transaction data is posted into the system. This status is run after the Confirm status, if you do not use the Running status then you will not be able to proceed to the next form (in this case the Invoice form). Similarly, to the Confirm status, to edit the Running status data, it must first be changed to the Revise status.
- Revise, this status is used only to edit data but cannot delete/eliminate (all) transaction data on this form.
- Pending, the transaction form is temporarily closed with the intention of postponement. This status can still be opened to continue again. If from the DO form you have continued to open the Supplier Invoice form and you give the Pending status to the DO form, then the Invoice transaction form and the Receipt transaction will also be postponed.
- Cancel, the transaction form is canceled and cannot be reopened.
- Close, all transaction forms are closed and cannot be reopened.
Change the Entry status to Confirm, then Running to post this transaction and use the wizard facility if you want to proceed to the next form, but you can also use the manual way (add item) in the next transaction in this case Invoice.
To display and print transaction documents, click the Preview button.