Invoice
Invoice is another important module in the SOFICloud ERP application used to manage the billing or invoicing process to customers. In this module, the company can generate sales invoices or bills for products or services that have been sold to customers.
In the Invoice, the company can enter information about customers, products or services sold, the quantity ordered, price, delivery date, and payment method. After the sales invoice is created, the SOFICloud ERP system will automatically create accounts receivable records, verify them, and process them in the customer's account.
The main benefit of using the Invoice module in the SOFICloud ERP application is that it allows companies to manage the billing process more efficiently and accurately. By using the Invoice, the company can accelerate billing time, increase accuracy, and optimize the company's financial management. In addition, the Invoice also helps increase customer satisfaction by providing accurate information about the bill and payment method.
Setup
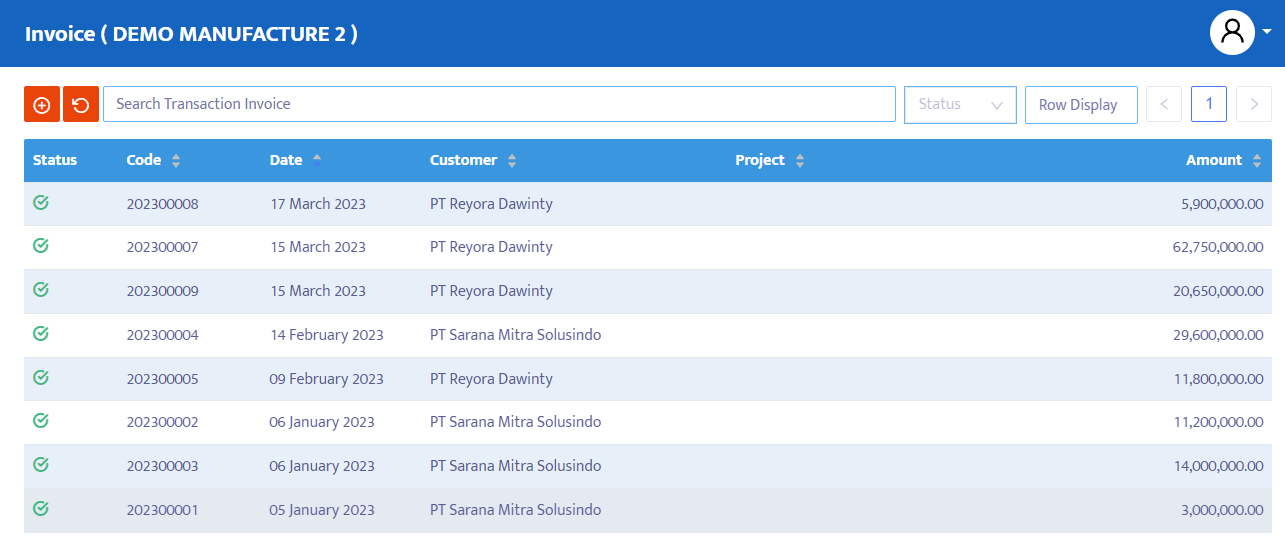
To record an Invoice transaction, select the Sales menu and then click the Invoice menu. The system will display the Invoice transaction menu as shown in Figure 5.4.
Here are the steps to complete the Invoice transaction:
- Click the Add Item [+] button on the Invoice transaction list that you have opened. See in Figure 5.4a.
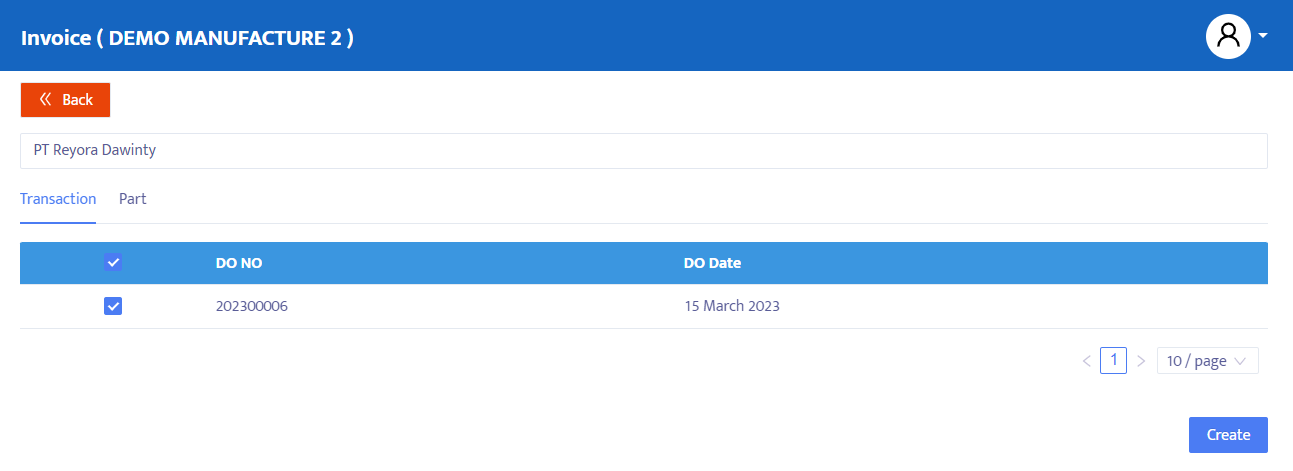
- Next, the system will display the add item form as shown in Figure 5.4b. Filter the Customer. Tick the desired transaction then click the Create button to create an Invoice transaction.
- After the Add Item process from the DO transaction is done, the system will display the Invoice transaction form that has contained information from the DO that was selected previously.
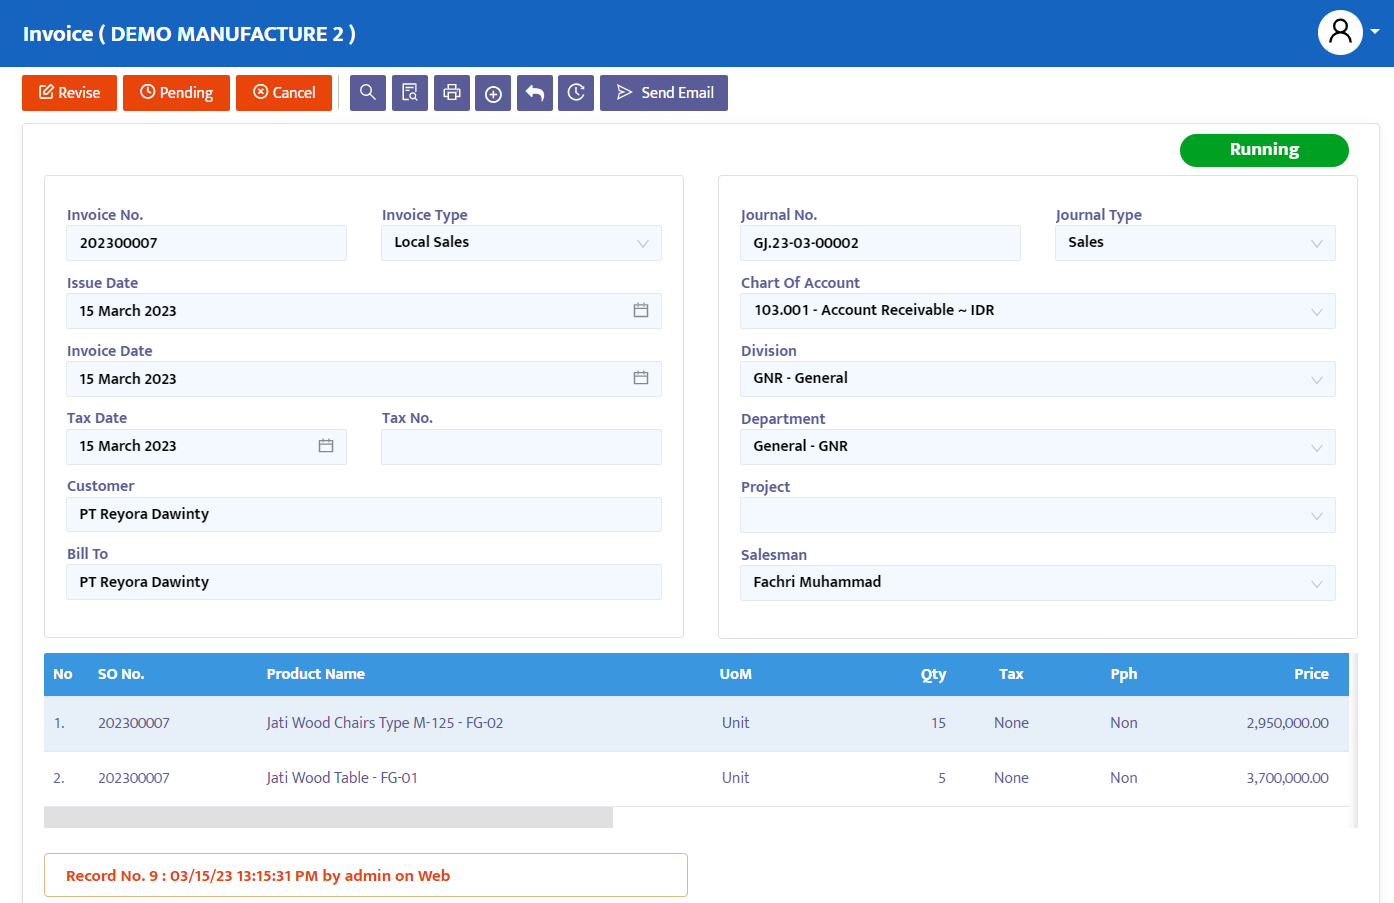
Recheck to ensure the accuracy of the data. Here is a detailed explanation of the information on the Invoice transaction:
- In the Invoice No field, the system will automatically provide a numbering but you can still edit it according to the needs or standards of the company.
- In the Invoice Type combo box, choose the invoice type as needed
- In the Issue Date field, the system will provide a date that is the same as the date on your computer when this form is opened. But you can edit this Invoice form date according to transaction needs
- In the Invoice Date field, type the invoice document date
- In the Tax No field, fill in the tax invoice document number if necessary
- In the Tax Date field, fill in the tax invoice date
- In the Customer combo box, the system will display the name of the customer you have previously chosen.
- In the Bill to column, it will display the customer who is billed. By default it will be the same, but it can be different if necessary
- In the Journal No field, the system will display the automatic journal number that has been created by the system
- In the Journal Type combo box, it contains information about the journal type of the relevant transaction
- In the Chart of Account combo box, choose the customer's receivable account to be used
- In the Division combo box, select the division that is responsible for this order if your company allocates per division.
- In the Department combo box, select the name of the department responsible for this order if your company allocates per department.
- In the Project combo box, select the project related to the relevant transaction request
- In the Salesman combo box, the system will display the name of the salesman from the sales transaction
After completing these data, the system will automatically display the product that you have taken from the previous PR transaction.
- DO No, contains DO number information from the previously selected transaction
- Part Name/ Product, contains the name of the selected product
- Quantity & UoM, contains the quantity of products sold. Make changes if necessary
- Tax, by default it will display the tax data that will be imposed on the transaction according to the setup that has been determined on the relevant product in the master part
- PPh, like the VAT Tax above, the system will also activate the PPh deduction if the relevant product is subject to certain PPh rates
- Price, contains price information of the relevant product. Make entry or price editing if necessary
- Amount, displays total qty x price
- CoA, contains the default sales account number information. Change if necessary
- Note, make more detailed and specific notes on the Note facility in each product you order.
After finishing, click the Save button at the top of the transaction to save data
On the navigation button above the transaction, make the necessary transaction status changes. The options provided by the system are:
- Entry, still in the process of registering the Invoice form transaction data into the system. At this status, data can still be edited and deleted.
- Confirm, transaction data is confirmed to the system but not yet posted. At this status, data cannot be edited unless the Confirm status is first changed to the Revise status.
- Running, transaction data is posted into the system. This status is run after the Confirm status, if you do not use the Running status then you will not be able to proceed to the next form (in this case the Receive form). Just like with the Confirm status, to edit Running status data, it must first be changed
- Running, transaction data is posted into the system. This status is run after the Confirm status. If you don't use the Running status, you won't be able to proceed to the next form (in this case the Receive form). Just like with the Confirm status, to edit data in the Running status, it must first be changed to the Revise status.
- Revise, this status is used only for editing data but cannot delete/eliminate (all) transaction data on this form.
- Pending, the transaction form is temporarily closed with the intention of postponement. This status can still be opened to continue.
- Cancel, the transaction form is canceled and cannot be reopened.
- Close, all transaction forms are closed and cannot be reopened.
Change the Entry status to Confirm, then Running to post this transaction and use the wizard feature if you want to proceed to the next form, but you can also use the manual way (add item) on the next transaction, in this case, Payment.
To display the printed transaction document, click the Preview button
Click the Send Email button to send the invoice document to the customer
Click the Voucher button to view the accounting journal that has been created.