Claim Expenses
The Claim Expenses module is used to refer to the action or process of submitting a claim to receive reimbursement for expenses incurred by an individual on behalf of a company while performing business activities or job duties. These expense claims are typically submitted to the employer or to an organization with rules or programs for expense reimbursement by filling out a claim form that details the expenses being requested for reimbursement.
Soficloud provides a feature to submit claims for direct reimbursement, allowing you to group several direct expenses into a single transaction.
Setup
To record a Claim Expenses form, select the Cash & Bank menu, then click on the Claim Expenses menu. The system will display the Claim Expenses transaction menu as shown in Figure 5.5.1.

Here are the steps to complete the Claim Expenses module:
Click the entry button to fill out the Claim Expenses module as shown in Figure 5.5.2 below:
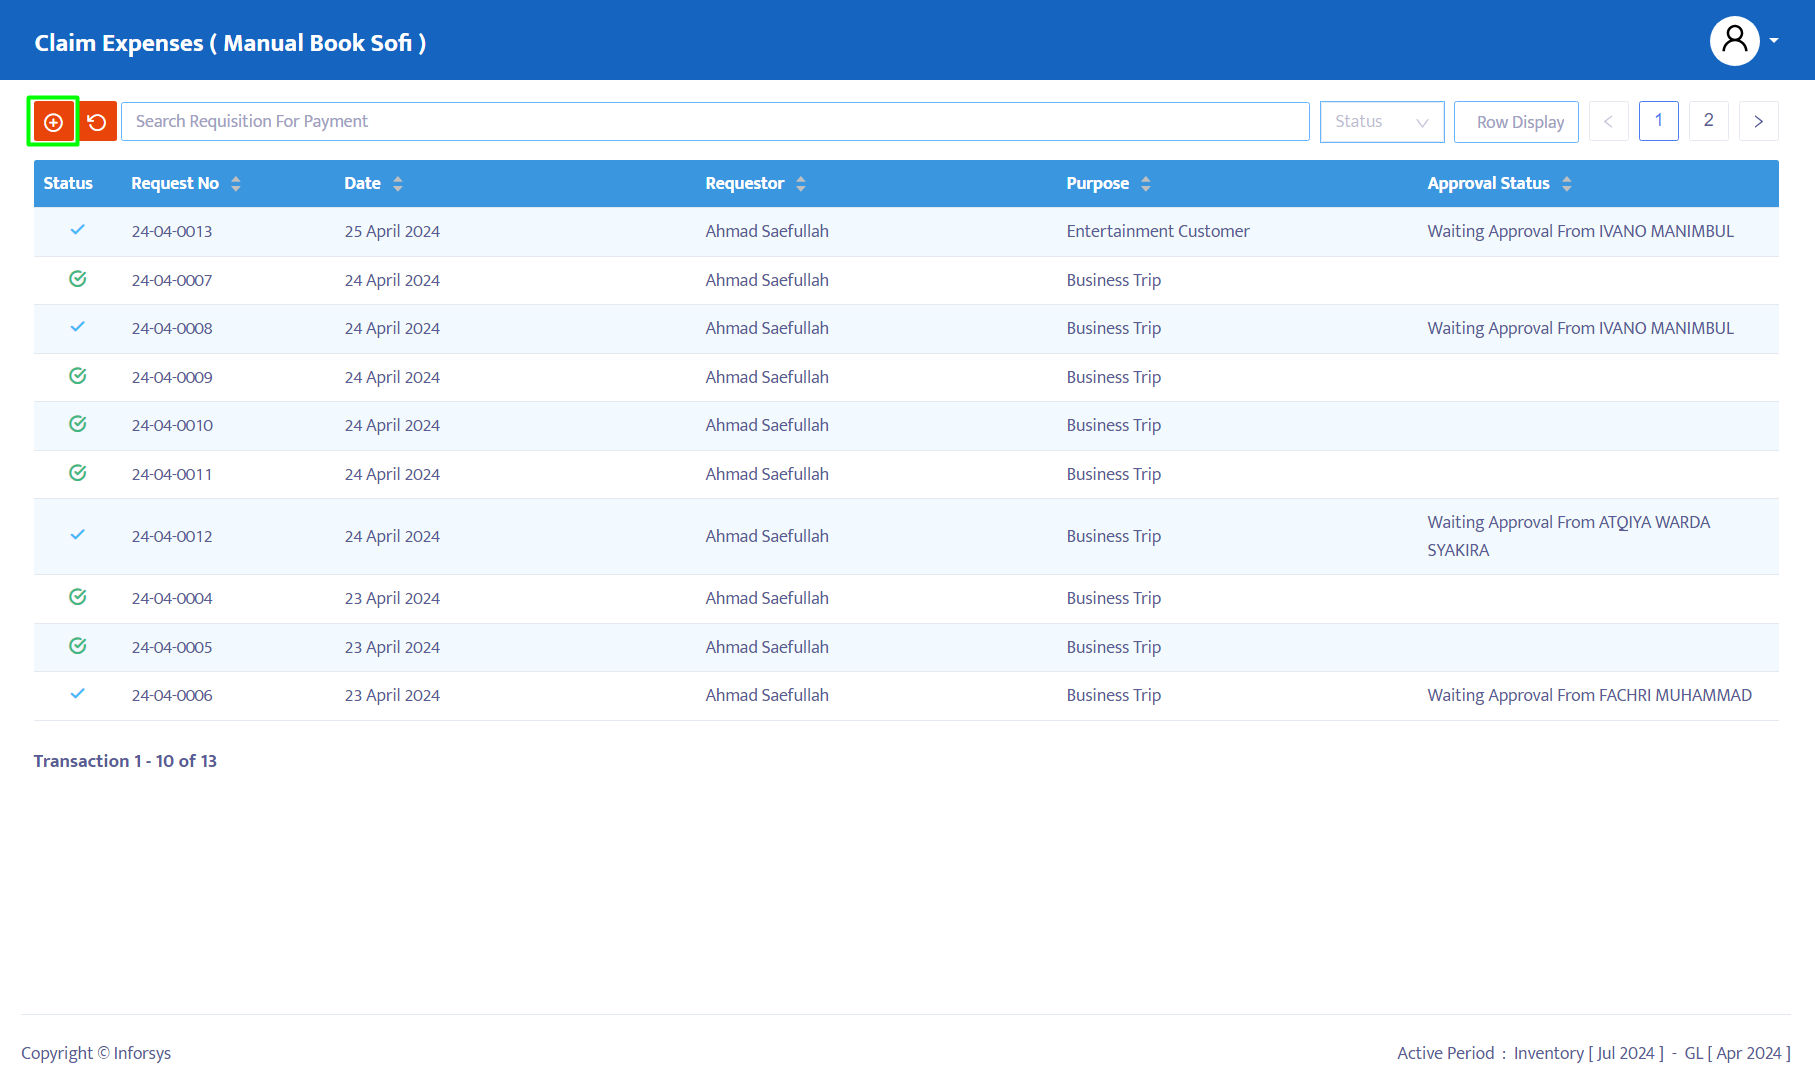
Figure 5.5.2 - Claim Expenses Next, the system will display the Claim Expenses module, which can be completed as shown in Figure 5.5.3 below:
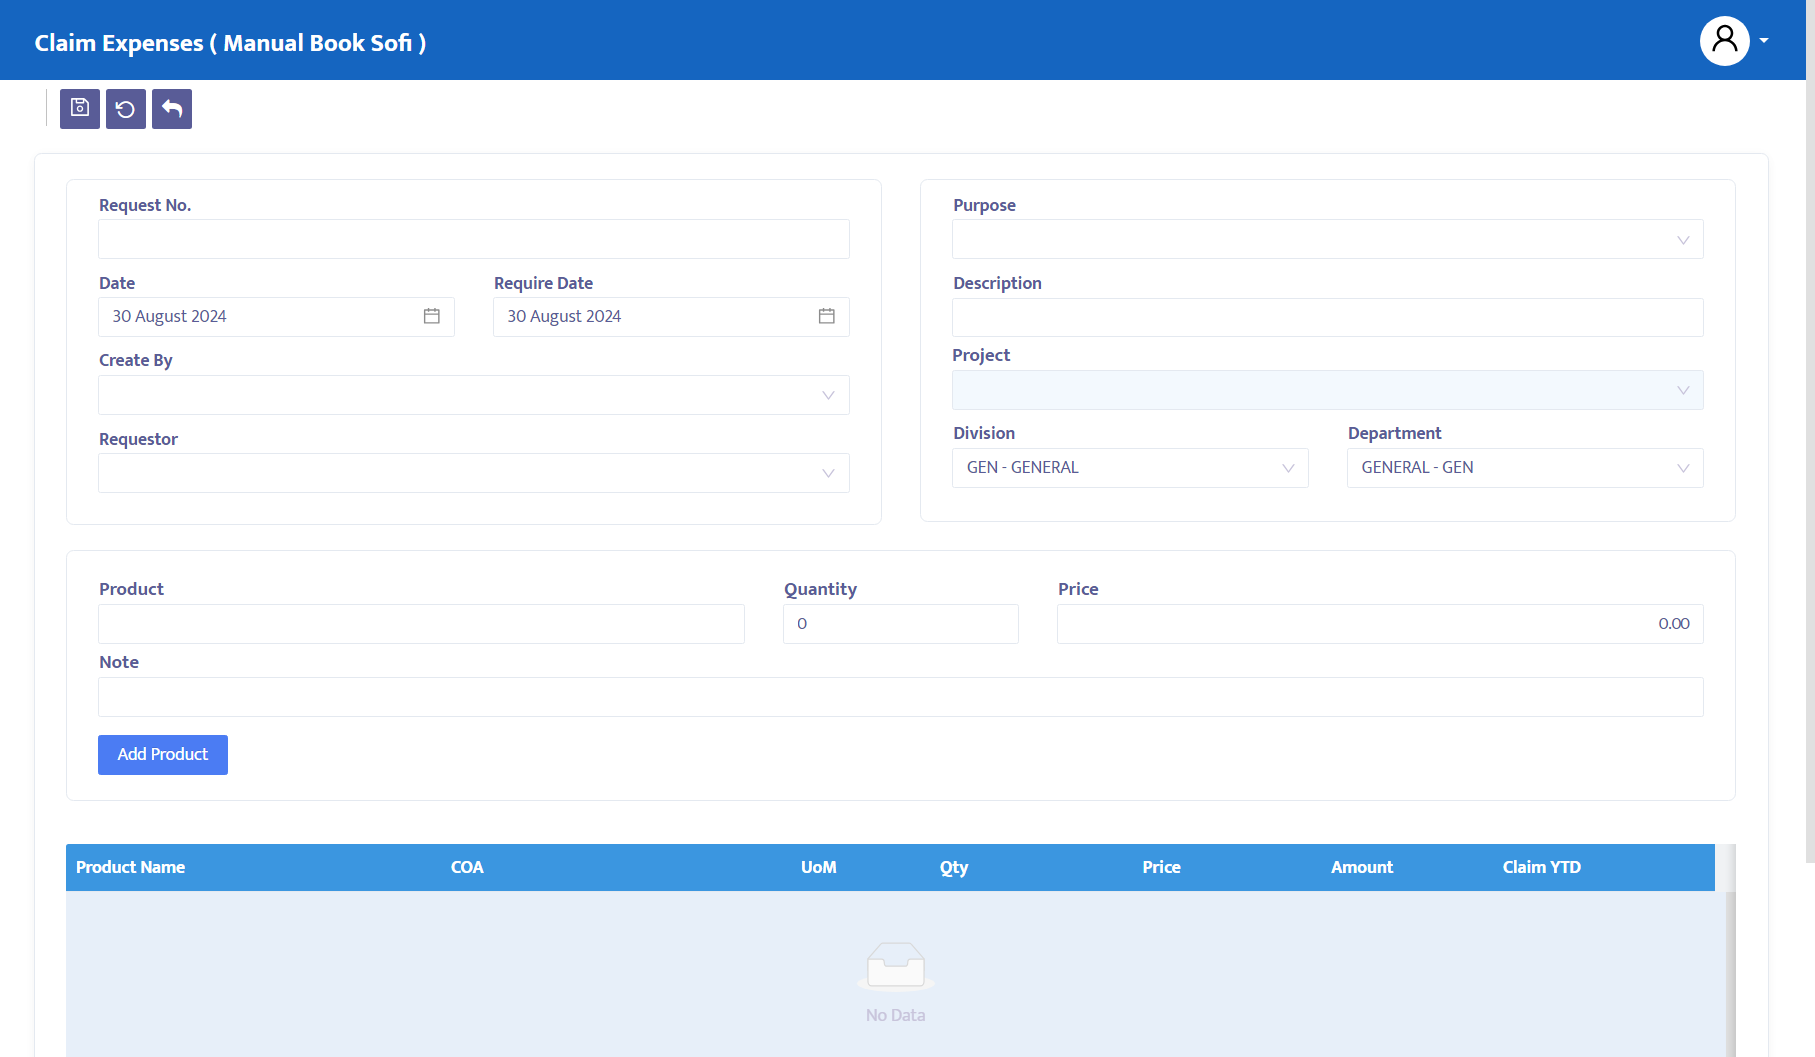
Figure 5.5.3 - Claim Expenses
Here are the steps to fill out the Claim Expenses form:
- In the Request No field, the system will automatically assign a number, but you can still edit it according to your company’s requirements or standards.
- In the Date field, the system will display the current date according to your computer's settings at the time the form is opened. However, you can edit the date on the Claim Expenses form as needed.
- In the Require date field, the system will again display the current date, but you can modify the required reimbursement date.
- In the Requestor combo box, select the name of the employee submitting the reimbursement request.
- In the Purpose field, enter the purpose of the Claim Expenses form.
- In the Description field, describe the expenses you are claiming.
- In the Project combo box, select the project related to the Claim Expenses transaction.
- In the Division combo box, choose the division responsible for this order if your company allocates by division.
- In the Department combo box, select the department responsible for this order if your company allocates by department.
- After completing the data, the system will automatically display a selection column for filling in expenses. Fill in the expenses as needed:
- Product: Search for the expense name or code from the list of products you have previously registered.
- Quantity: Enter the quantity of expenses for which you are requesting reimbursement.
- Price: Enter the price of the expense in question.
- Supplier: Select the supplier for the expenses you wish to be reimbursed.
- Note: Provide a detailed description of the expense.
Once all fields are filled, click the Add Product button as shown in Figure 5.5.4:
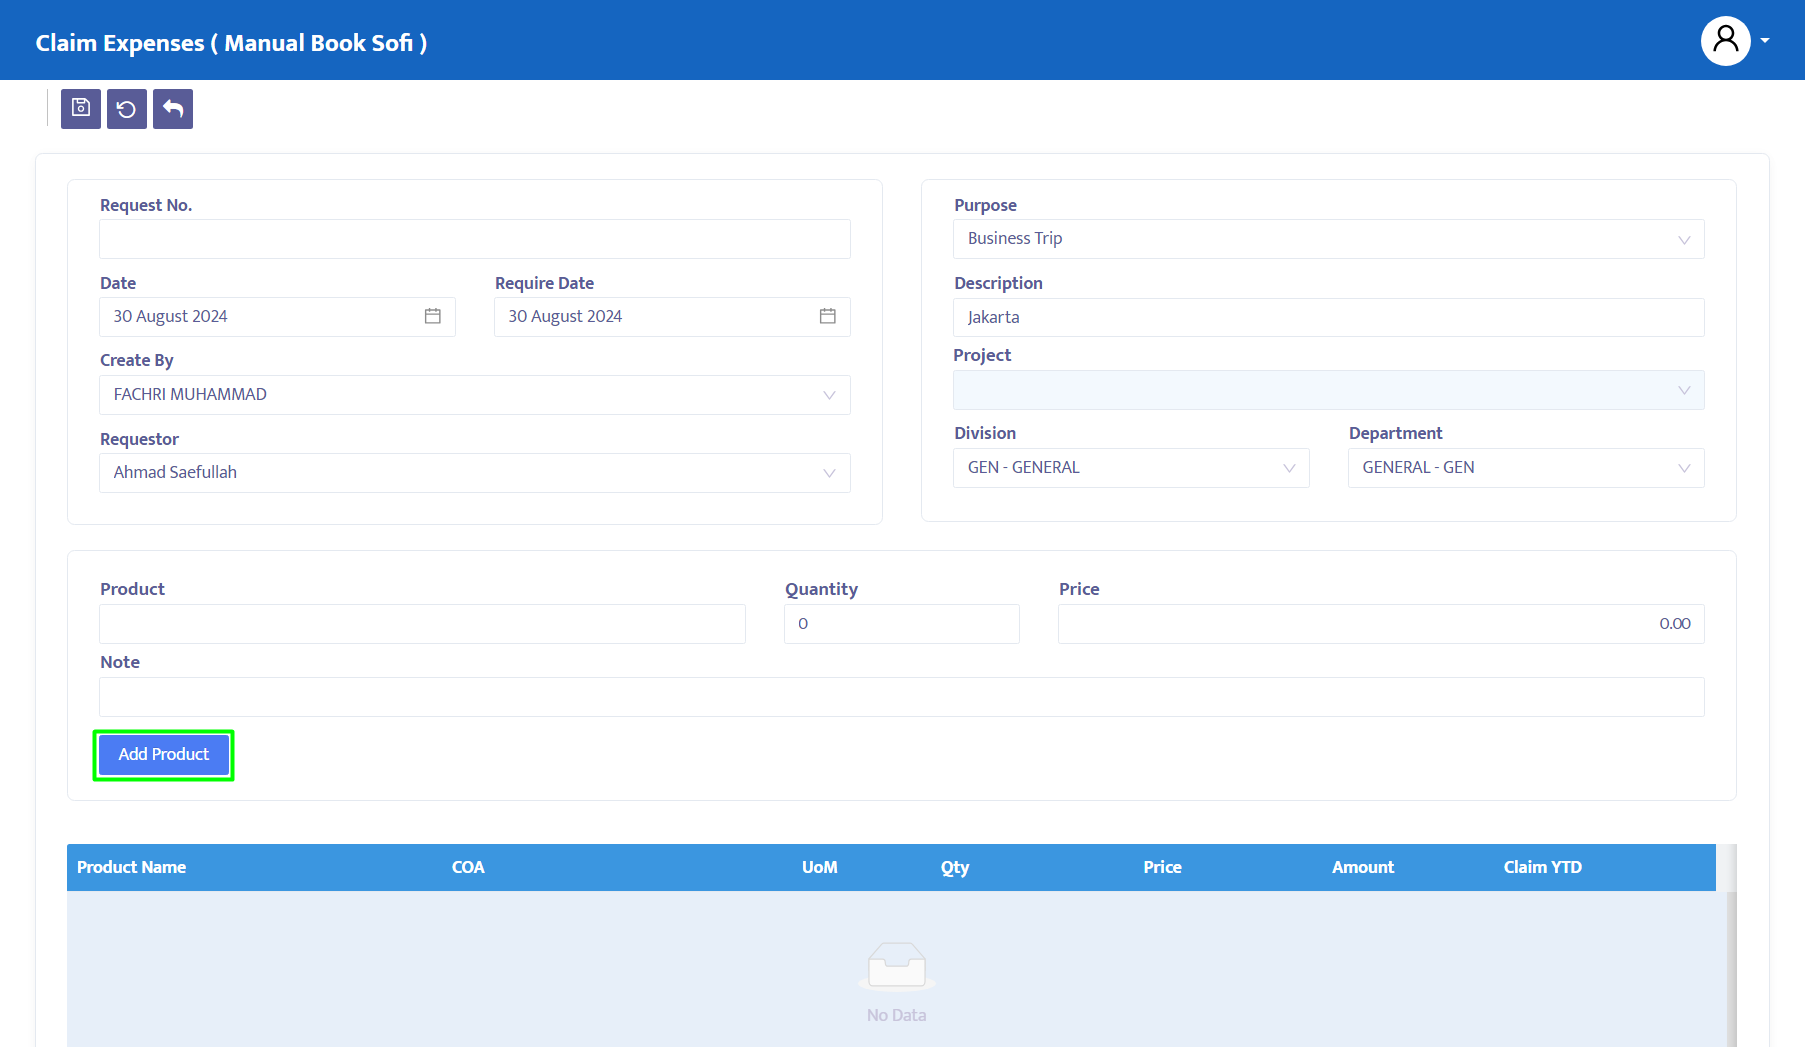
Figure 5.5.4 - Claim Expenses If all expenses have been added, you can save the Claim Expenses form as shown in Figure 5.5.5:
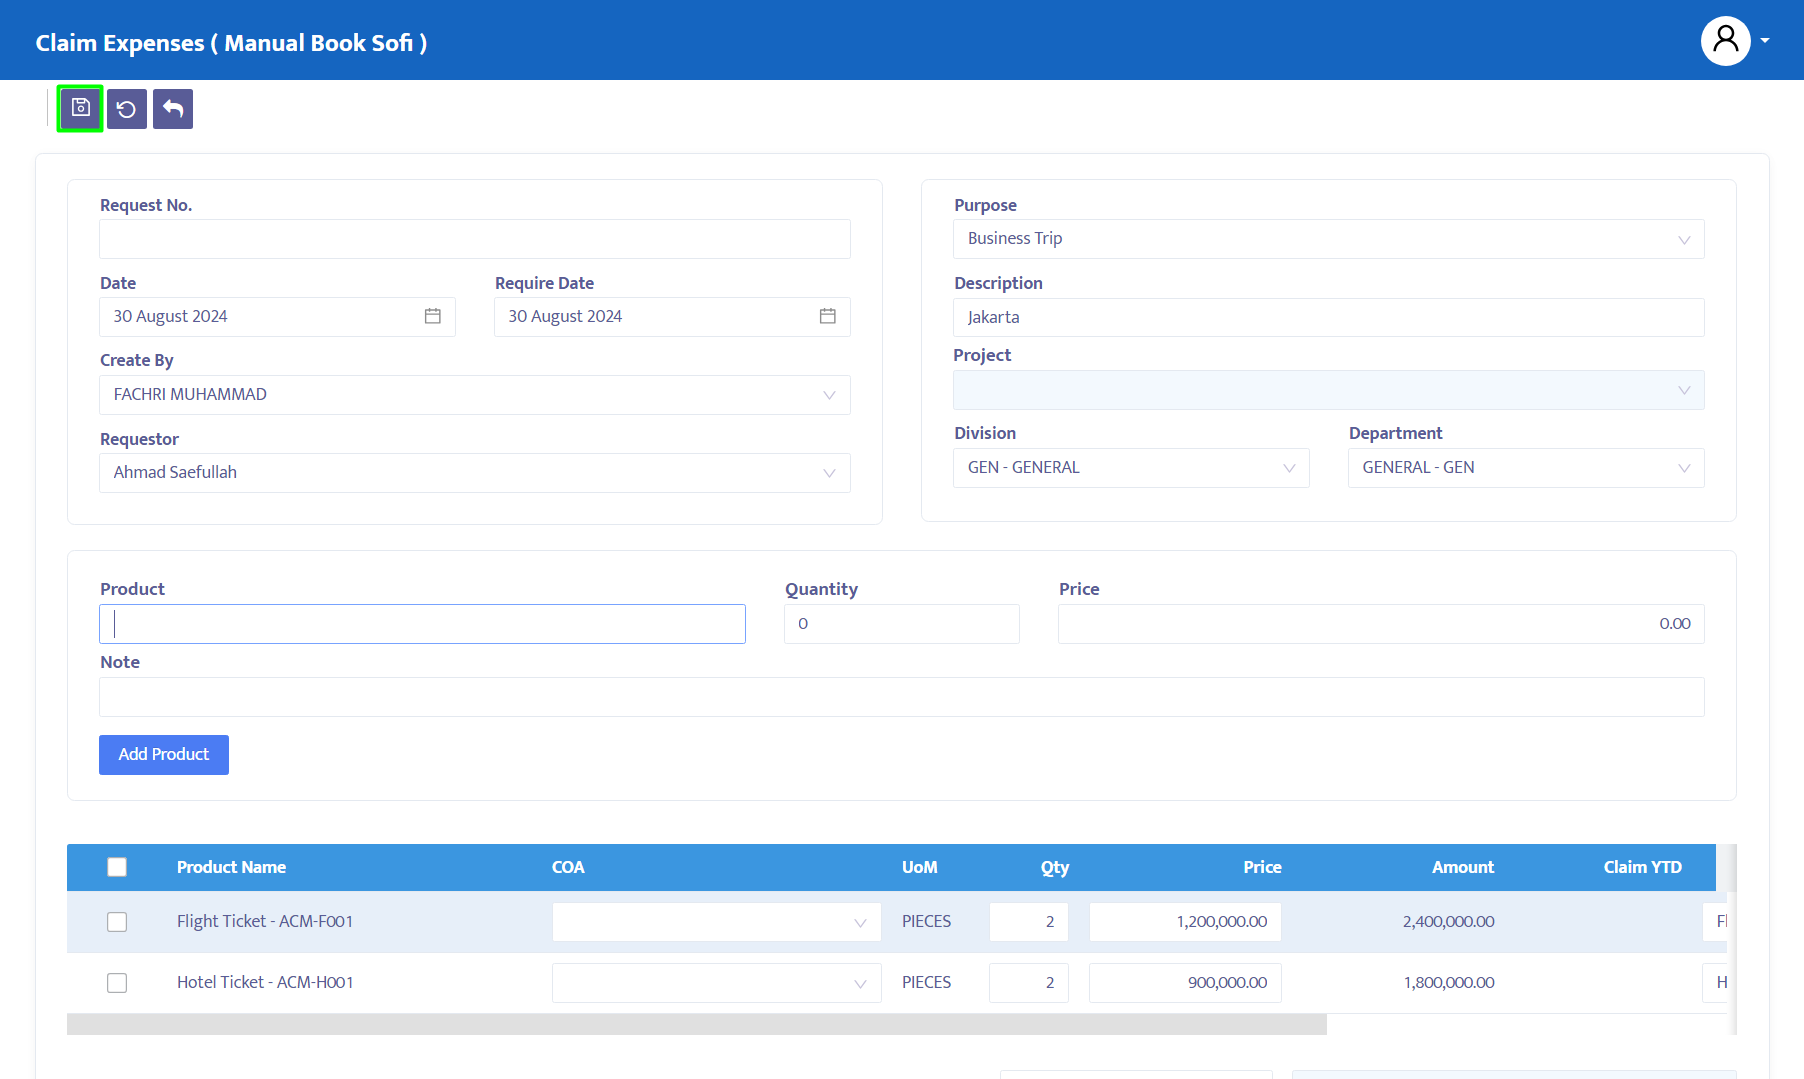
Figure 5.5.5 - Claim Expenses In the navigation buttons above the transaction, make the necessary changes to the transaction status. The options provided by the system are:
- Entry: The data entry process for the transaction form is still ongoing. At this status, data can still be edited or deleted.
- Confirm: The transaction data is confirmed in the system but not yet posted. In this status, data cannot be edited unless the Confirm status is first changed back to Revise.
- Running: The transaction data is posted in the system. This status is applied after Confirm. If you do not use the Running status, you will not be able to proceed to the next form (in this case, the Account Payable form). As with Confirm status, to edit Running status data, it must first be changed back to Revise.
- Revise: This status is used only to edit data, but cannot delete/remove (all) transaction data in this form.
- Pending: The transaction form is temporarily closed for delay. This status can still be reopened to continue the process.
- Cancel: The transaction form is canceled and cannot be reopened.
Change the status from Entry to Confirm to confirm the Claim Expenses form.
Once the Claim Expenses status is Confirmed, the stakeholders designated in the setup module will receive an email for approval.
The approval status can be viewed by clicking on the Status Approval button as shown in Figure 5.5.6, and an example of the approval status will be displayed as in Figure 5.5.7:
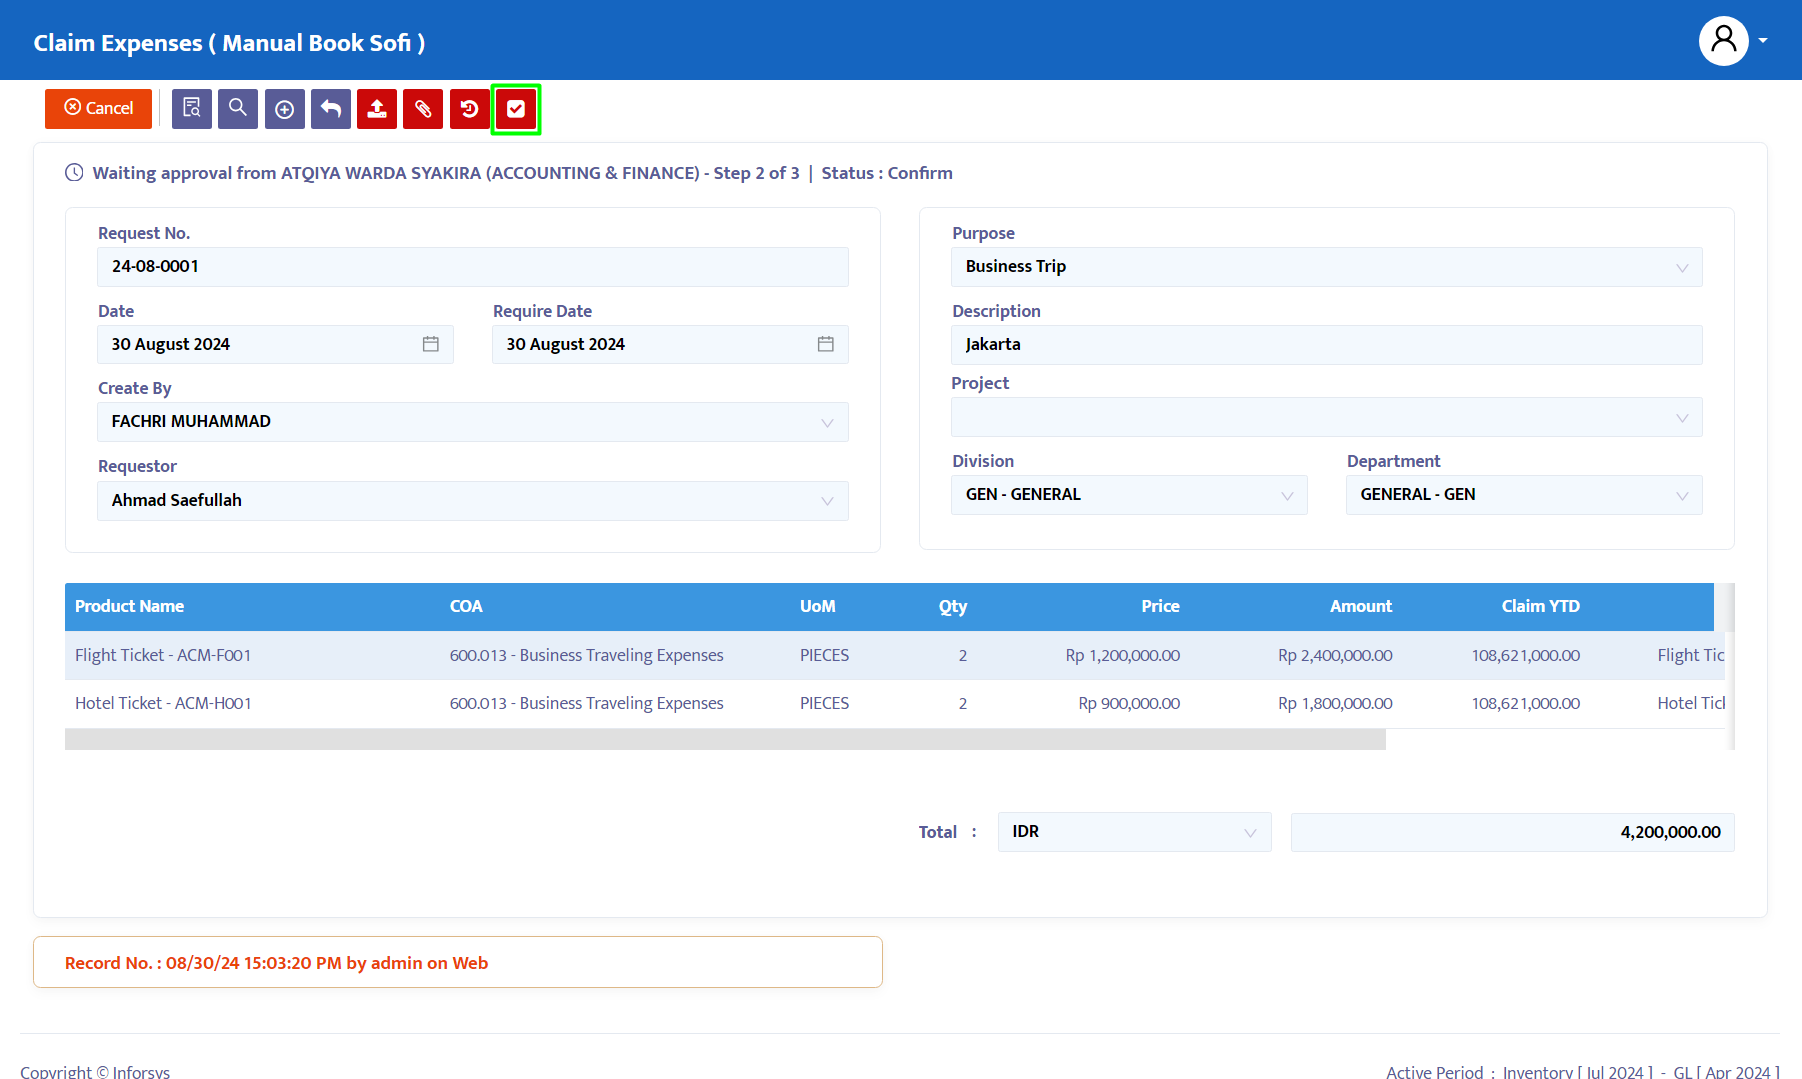
Figure 5.5.6 - Claim Expenses 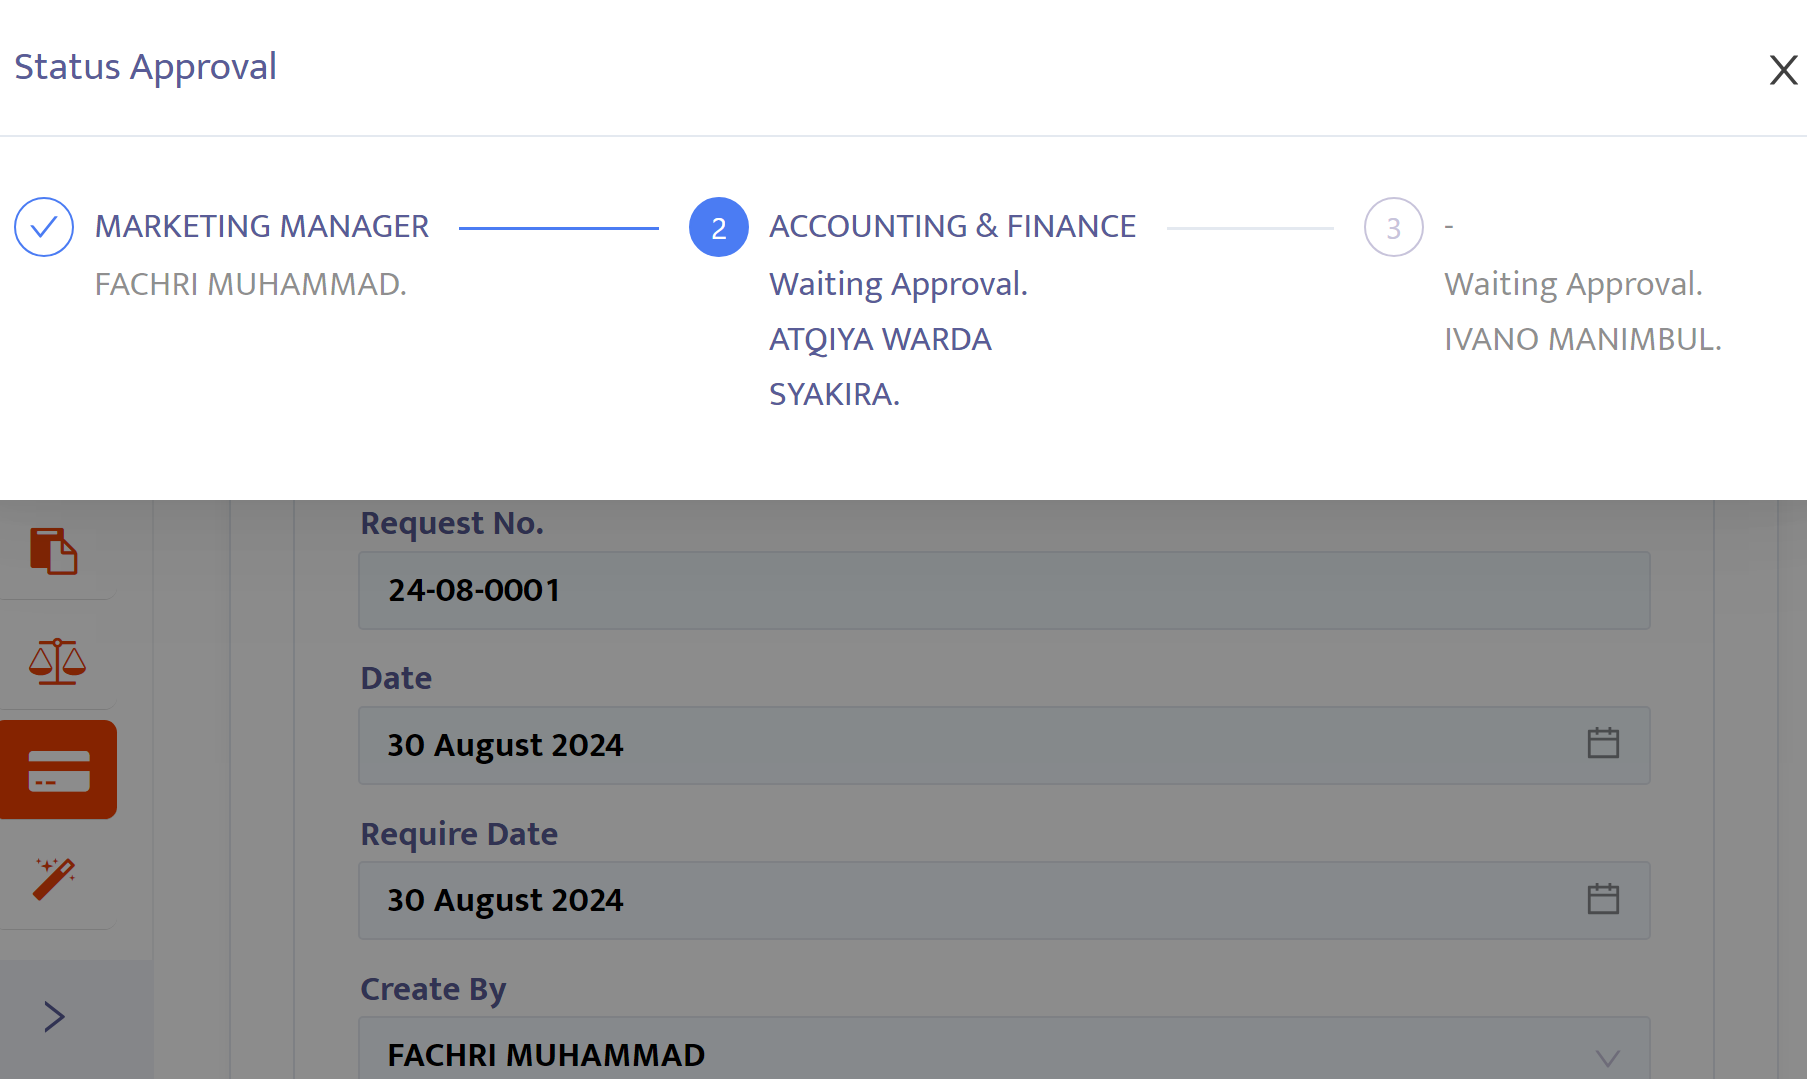
Figure 5.5.7 - Claim Expenses Stakeholders can approve the transactions to be paid or reject the transactions. If you approve/reject via the navigation button, it will automatically approve/reject the entire transaction, as shown in Figure 5.5.8:

Figure 5.5.8 - Claim Expenses If you want to reject one transaction and approve another, you can click the approve/reject button in the transaction detail column, as shown in Figure 5.5.9:
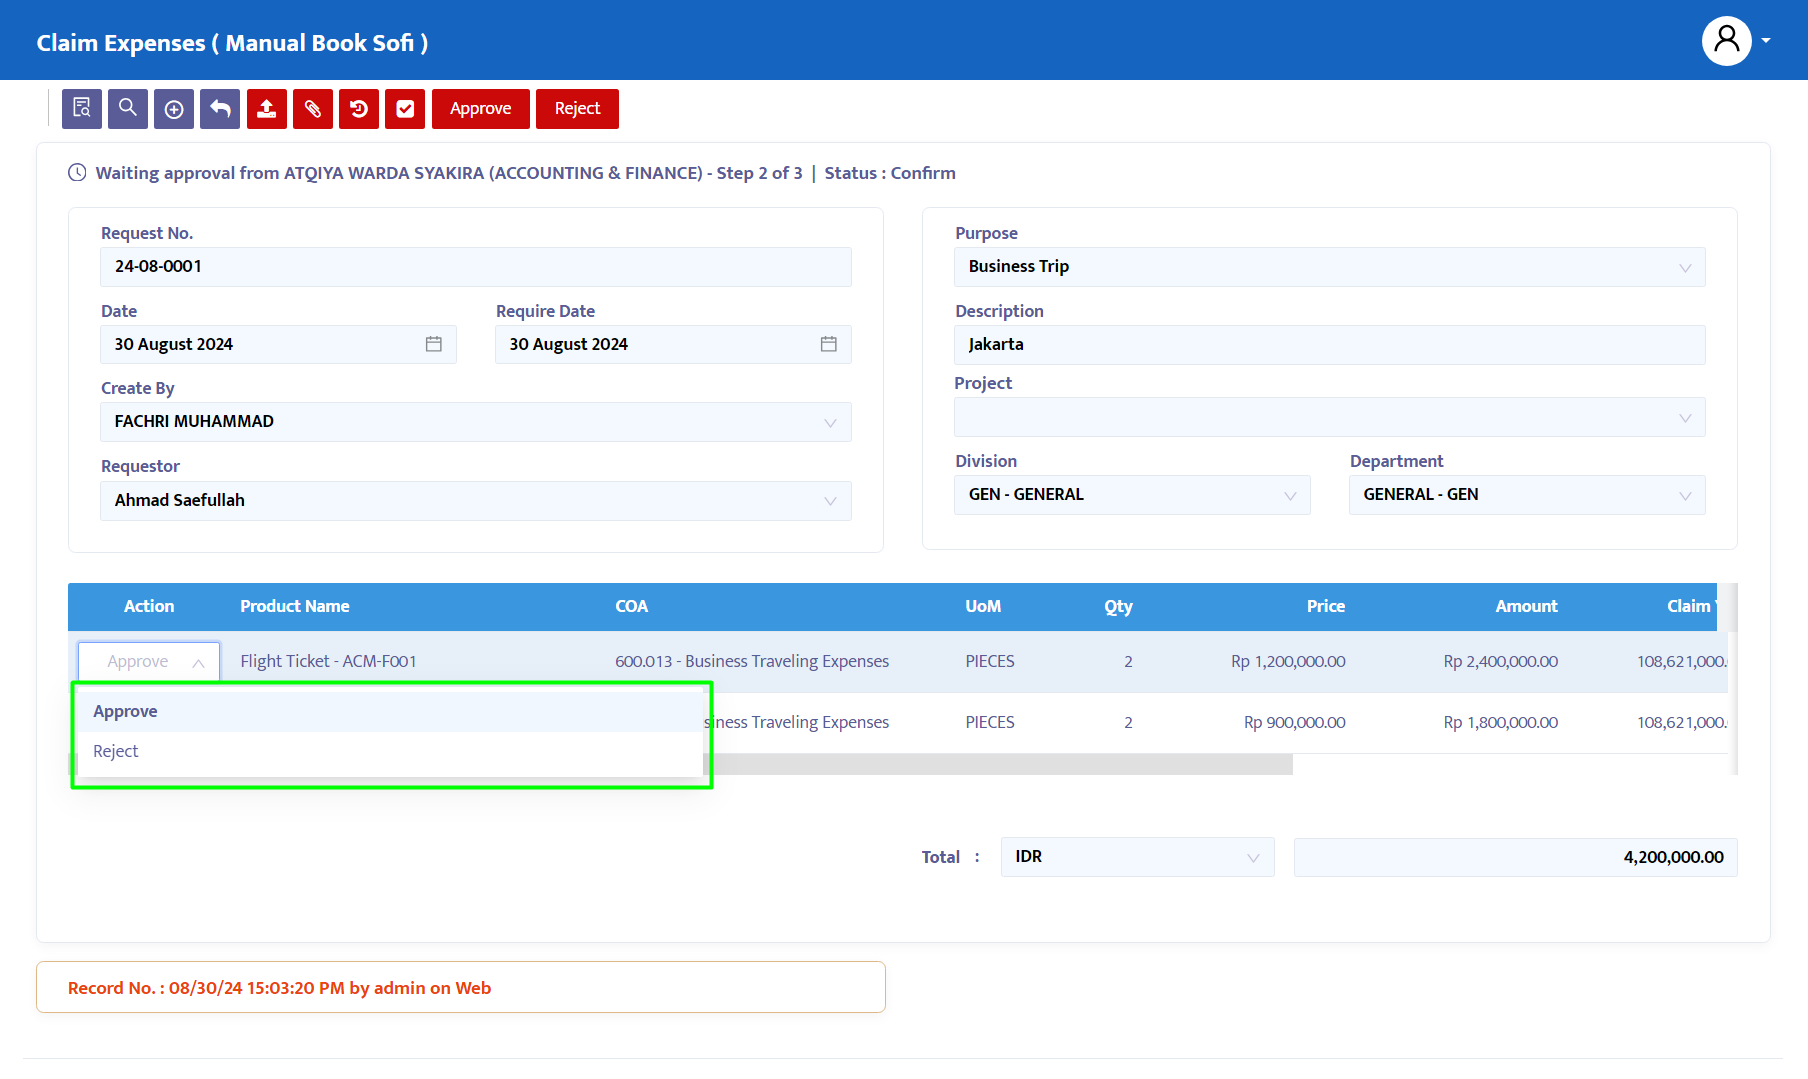
Figure 5.5.9 - Claim Expenses Once the Approval status is completed, the Claim Expense form status can be changed to Running, as shown in Figure 5.5.10, and can proceed to payment in the Account Payable module.
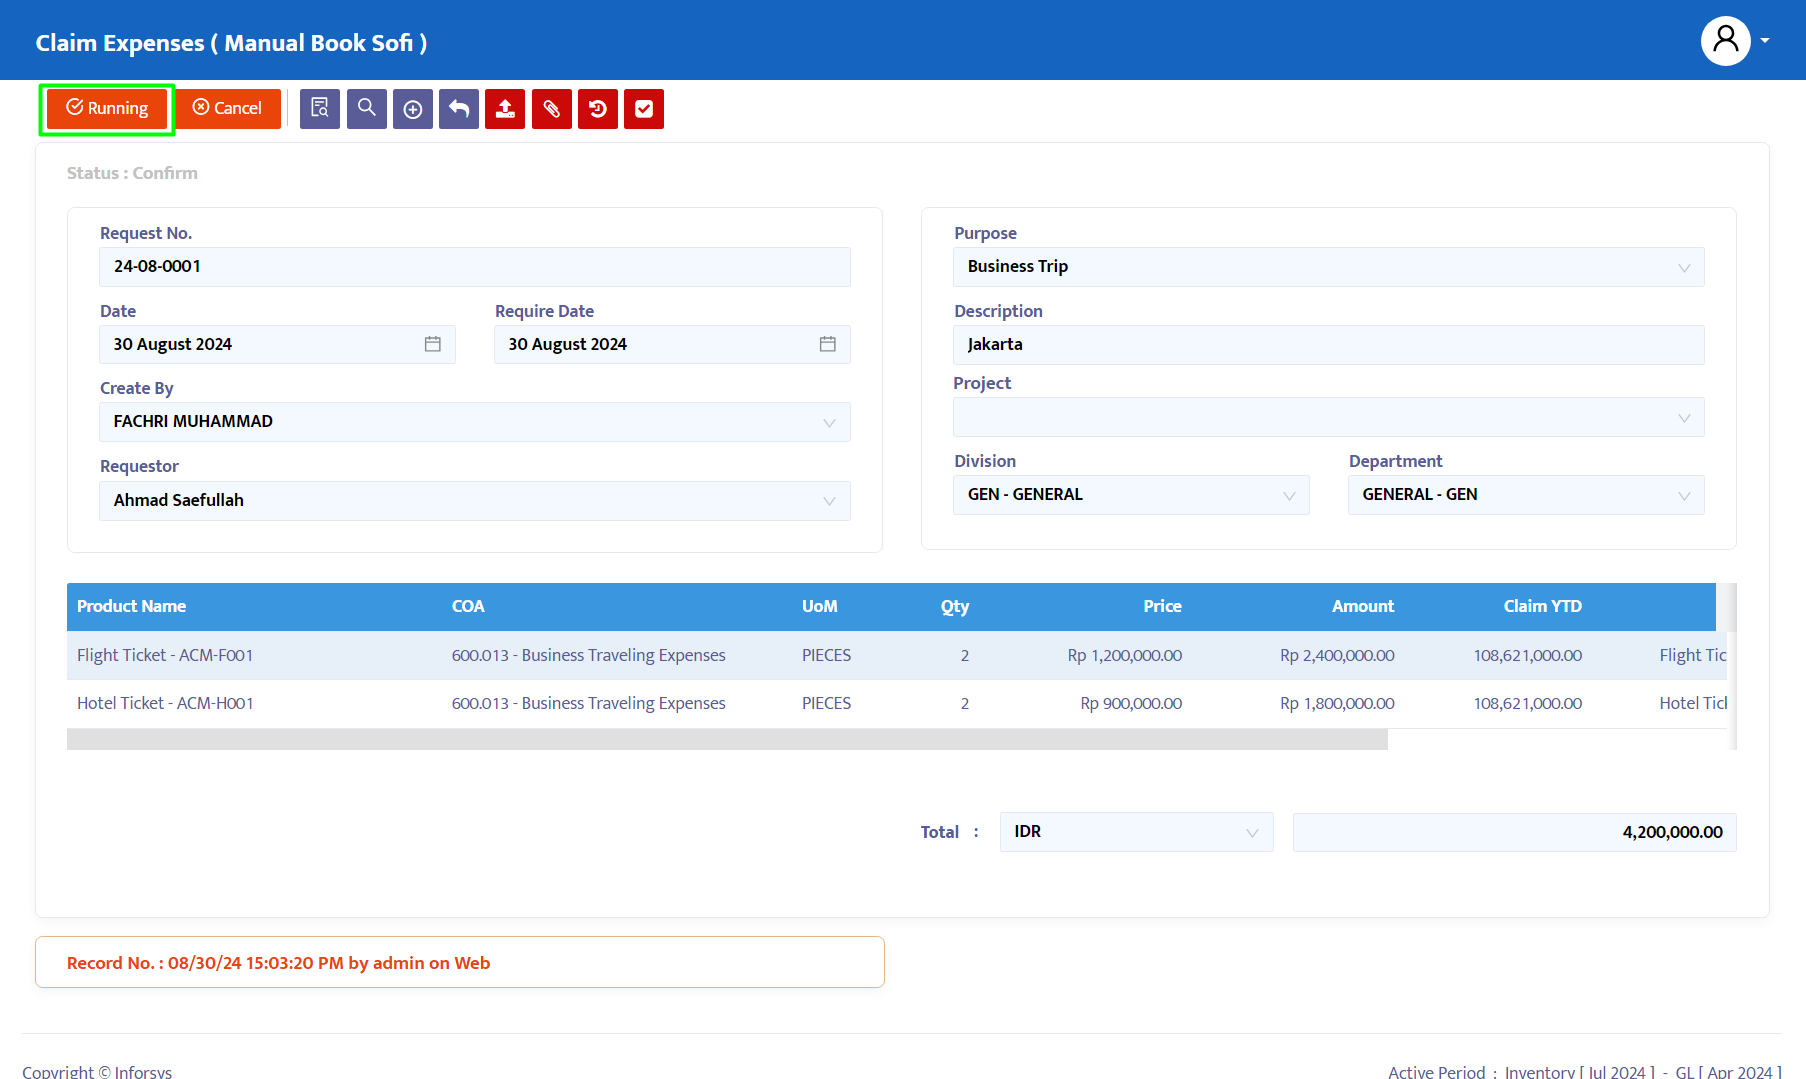
Figure 5.5.10 - Claim Expenses 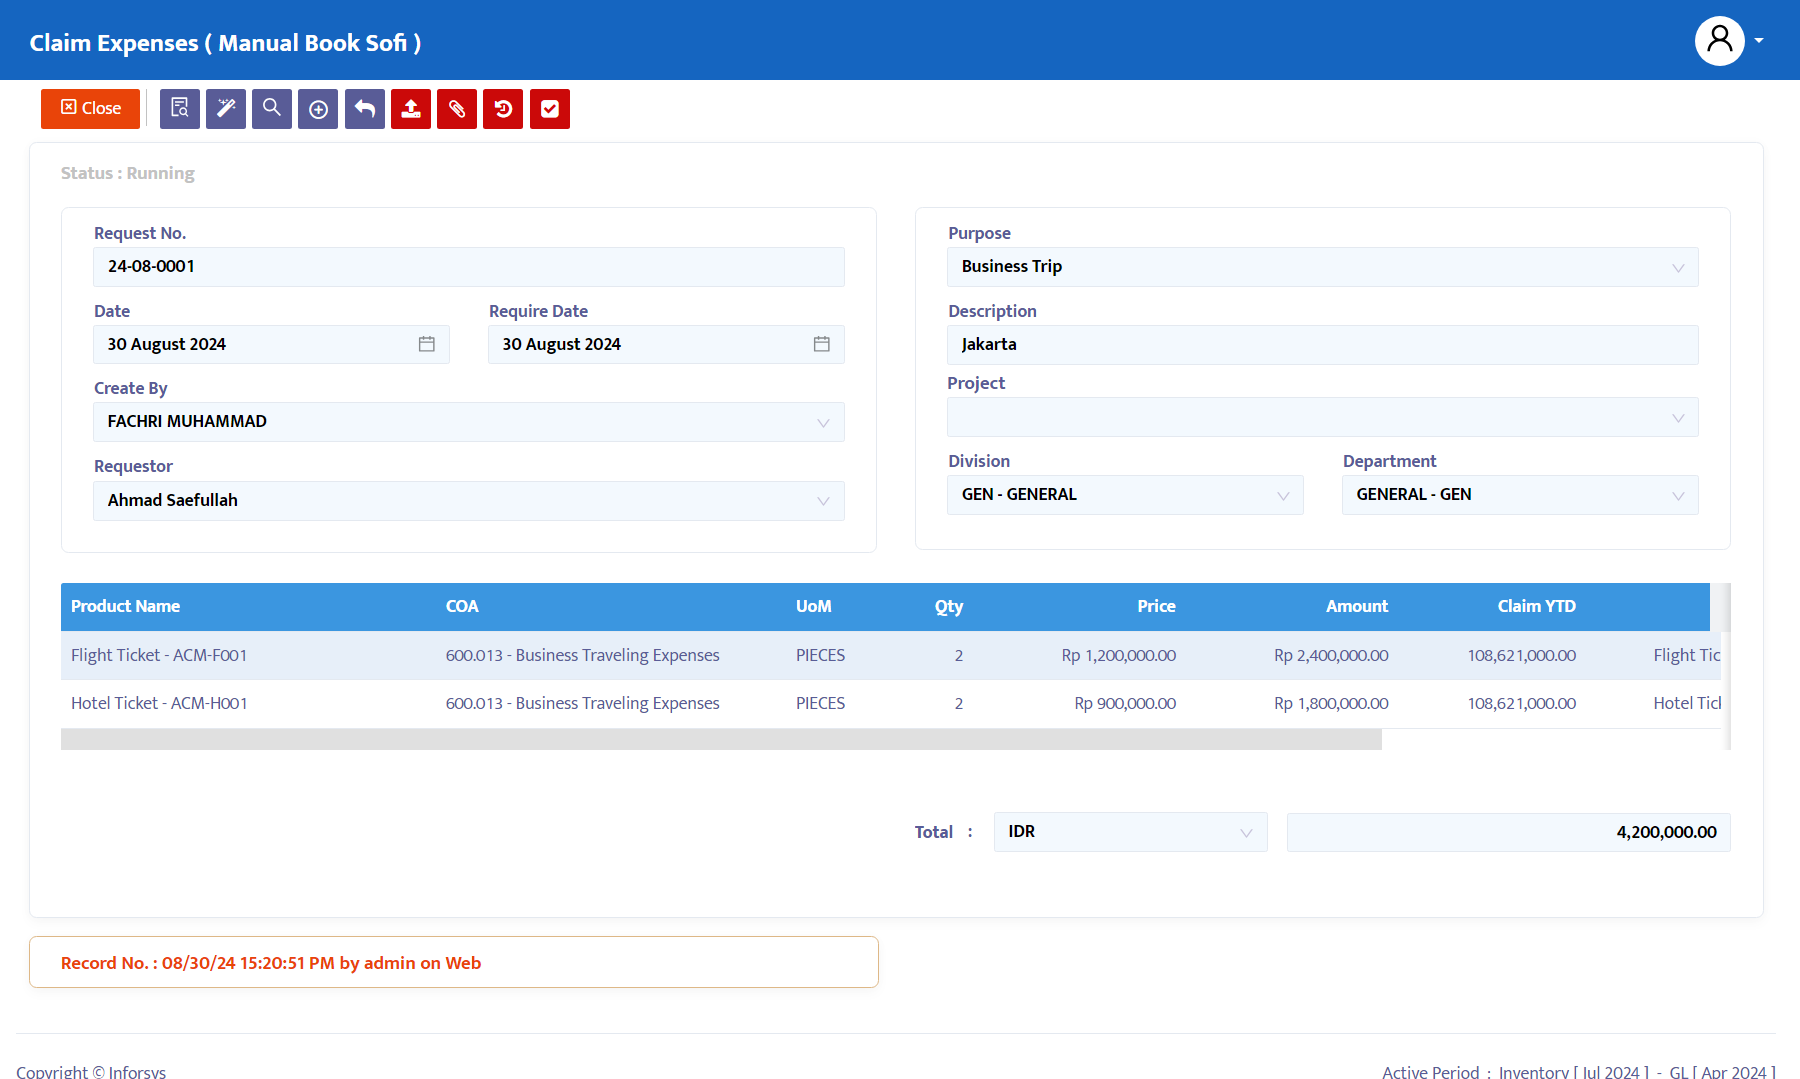
Figure 5.5.11 - Claim Expenses